> ## Documentation Index
> Fetch the complete documentation index at: https://docs.nuon.co/llms.txt
> Use this file to discover all available pages before exploring further.
# Nuon Apps
> Package your existing application code and infrastructure to create Bring Your Own Cloud installable versions of your product.
Apps are versions of your application code and infrastructure that can be
deployed into a customer cloud account.
Nuon is designed so you can lift and shift your *existing* application and
infrastructure into new deployment options. Most Nuon users will create multiple
apps to offer different "flavors" of BYOC to their customers. e.g., AWS, Azure
versions, dev, prod environment versions, create a VPC, re-use a VPC versions,
etc.
## What Is An App?
When you first set up Nuon, you will map your existing product into one or more
apps. An App is a fully configured version of your product that can be installed
into your customer's cloud account.
## How do you configure an App?
Each app is represented as multiple configuration TOML files.
New to app config? [App Initialization](/guides/app-init) scaffolds a new app you can edit and sync.
Each app consists of the following parts:
* `Sandbox` - The base infrastructure layer e.g., AWS EKS, Azure AKS
* `Runner` - The Nuon service that manages the install
* `Inputs` - Customer-provided input values specific to each install e.g., app
release, domain name
* `Components` - Your application e.g., Helm, manifests, load balancers,
certificates, Terraform
Components can pull from your own Git repositories. To use **private** repositories, connect your GitHub account or organization to your Nuon org first — public repositories need no connection:
```sh theme={null}
nuon orgs connect-github
```
Confirm the connection:
```sh theme={null}
nuon orgs list-vcs-connections
```
You can also connect from the dashboard: click your organization name in the top left, then **Add** next to GitHub Connections. See [Connect GitHub](/guides/vcs) for the full walkthrough.
## Sandbox
The sandbox sets up your application's base **compute** environment, such as a Kubernetes (EKS, AKS, GKE) or ECS cluster. It gives your app a consistent, isolated place to run across every install. In a shared-responsibility model, the sandbox can also build on infrastructure a customer already provides, such as an existing cluster.
Read more about the [Sandbox](/concepts/sandboxes) concept, or follow the [Configuring Sandboxes](/guides/configuring-sandboxes) guide to set one up.
## Networking
Networking is provisioned by the install [Stack](/concepts/stacks): the Terraform or CloudFormation/Bicep that the customer deploys first.
The Stack creates:
* The network the app runs in (a VPC on AWS, a VNet on Azure)
* The [Runner](/concepts/runners) that deploys and operates your app
* The [permissions](/concepts/operation-roles) the Runner needs
The sandbox then runs inside this network. The Stack can create a fresh network or reuse resources the customer already has. See [Stacks](/concepts/stacks) for the available patterns.
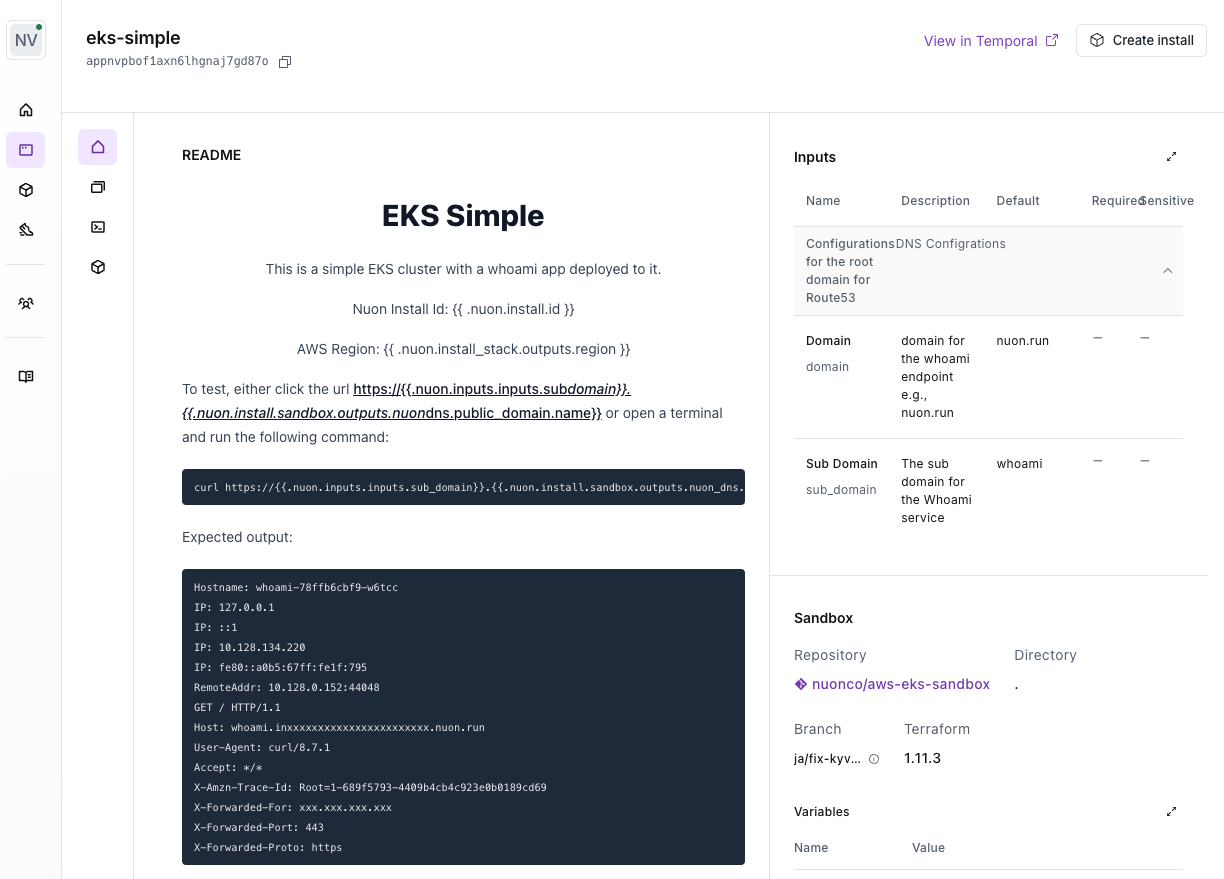
## Inputs
Inputs allow you to define different inputs that customers can provide to an app.
This enables you to create "configuration" knobs that your customers can manage
to control your application.
Inputs are commonly used to:
* Allow users to select regions and provide access to an account
* Customize app & infrastructure versions, such as pinning a Kubernetes cluster
version
* Re-use existing infrastructure, such as providing a `vpc_id` that has been
granted access
Read more about [Inputs](/concepts/app-inputs), and see [Configuring Inputs & Secrets](/guides/configuring-inputs-and-secrets) for a step-by-step walkthrough.
## Components
Components are used to connect your existing application and infrastructure code
to your app.
Components allow you to:
* Import existing images, or build Dockerfiles and sync these artifacts into
customer accounts
* Deploy Helm charts
* Deploy Kubernetes manifests
* Deploy Terraform code
Common components include certificates, load balancers, Kubernetes operators or
Helm to deploy an app or database, etc.
Apps allow you to create [dependencies between components](/guides/component-dependencies) and expose a rich
configuration language to share outputs between components for configuration.
You can use [variables](/guides/using-variables) to configure components with
the outputs of other components.
Read more about the [Components](/concepts/components) concept, or get hands-on with [Managing Components](/guides/managing-components). Jump straight to your component type:
## READMEs
When running an app in an [Install](/concepts/installs), you often need to
document important info. e.g., the app's access URL, the install state, links to
documentation.
It can also be nice to have some level of programmability, such being able to
render a button that will trigger an [action](/concepts/actions). Additionally,
this documentation must be rendered per-Install because certain values -- such
as URLs -- will be different for each Install.
App READMEs were introduced to support this. Each app has a `README.md` text field
where you can define a Markdown document which will be rendered in the dashboard
for each Install of that App. You can use all valid Markdown, including HTML.
You can also use variables, so that the document will be custom-rendered for
each Install.
See the [Using READMEs](/guides/using-readmes) guide for more details.
## App Management
The [CLI](/cli) exposes many operational commands to manage apps. The dashboard can also provide limited app management functionality. See the [Managing Apps](/guides/managing-apps) guide for common workflows.
To see all available commands, run: `nuon apps --help`.
Commands for creating, deleting, and viewing apps.
**Create a local app directory** - Create a directory and name it after your
app. This directory will contain your App's configuration files.
```sh theme={null}
nuon mkdir your-app
cd your-app
```
**Create an app** - `.toml` config files are used to represent a configuration for a single
app. For consistency, the app name must be the same name as the directory you
created above.
```sh theme={null}
nuon apps create --name=your-app
```
**List all apps** - List all apps using the CLI or dashboard.
```sh theme={null}
nuon apps list
```
 **Pinning an app** - pin your app
You can pin an app, which will set its ID as a default argument to all app
commands. This is helpful to avoid having to pass `-a` to each command.
```sh theme={null}
nuon apps select
```
Each example below assumes you have run `nuon apps select` first.
To show the currently pinned app:
```sh theme={null}
nuon apps current
```
**Get an app** - Get basic info about app
```sh theme={null}
nuon apps get
```
**Rename** - Rename an app
```sh theme={null}
nuon apps rename --name=new-name
```
### Configuration
You can view various configs for an app and sync configuration files using the
[CLI](/cli).
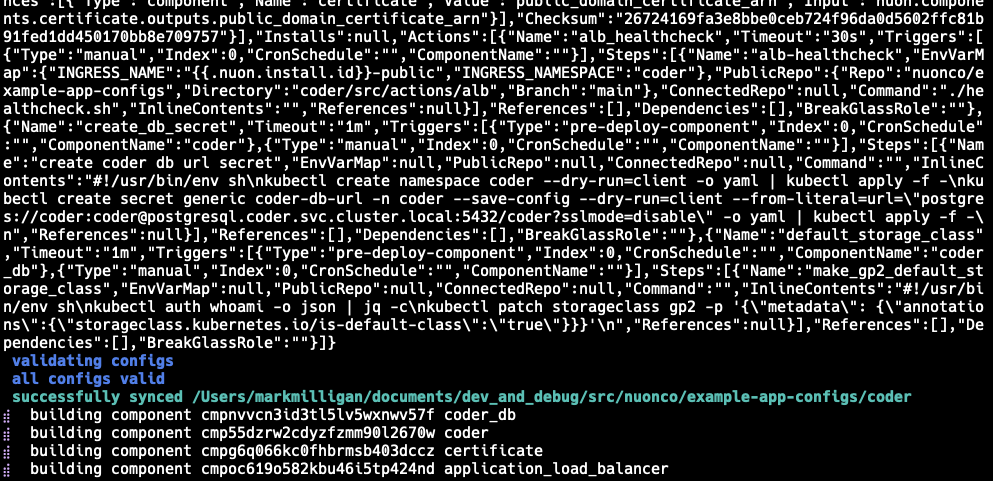
**Sync** - Sync config files to the Nuon control and data plane
Sync is a critical step as you iterate and update you app configuration. Syncing performs syntax
validation, uploads your configuration to the Nuon control plane, and triggers builds for any components. e.g., Terraform module, Helm chart, Kubernetes manifest, container image.
If any component TOML files have changed, or any related files such as Helm `values.yaml` files, a new build will be triggered during sync.
If component source files have changed, you must push those changes to your git repo, then manually build the component using the dashboard or CLI.
Sync all config files in the current directory:
```sh theme={null}
nuon apps sync
```
**Pinning an app** - pin your app
You can pin an app, which will set its ID as a default argument to all app
commands. This is helpful to avoid having to pass `-a` to each command.
```sh theme={null}
nuon apps select
```
Each example below assumes you have run `nuon apps select` first.
To show the currently pinned app:
```sh theme={null}
nuon apps current
```
**Get an app** - Get basic info about app
```sh theme={null}
nuon apps get
```
**Rename** - Rename an app
```sh theme={null}
nuon apps rename --name=new-name
```
### Configuration
You can view various configs for an app and sync configuration files using the
[CLI](/cli).
**Sync** - Sync config files to the Nuon control and data plane
Sync is a critical step as you iterate and update you app configuration. Syncing performs syntax
validation, uploads your configuration to the Nuon control plane, and triggers builds for any components. e.g., Terraform module, Helm chart, Kubernetes manifest, container image.
If any component TOML files have changed, or any related files such as Helm `values.yaml` files, a new build will be triggered during sync.
If component source files have changed, you must push those changes to your git repo, then manually build the component using the dashboard or CLI.
Sync all config files in the current directory:
```sh theme={null}
nuon apps sync
```
 **Configs** - List all config versions for an app
```sh theme={null}
nuon apps configs
```
**Runner-config** - Print the current runner config
```sh theme={null}
nuon apps runner-config
```
The output of the following 2 sub-commands are JSON so to improve readability,
use `jq` or `python`
```sh theme={null}
nuon apps | jq
nuon apps | python -m json.tool
```
**Sandbox-config** - Print the current sandbox config
```sh theme={null}
nuon apps sandbox-config
```
**Input-config** - Print the current input config
```sh theme={null}
nuon apps input-config
```
## App Metadata
You can add the following metadata to your app, which is used in
installers:
* `display_name`
* `description`
This metadata can be added via a `metadata.toml` config file in the app root directory:
```toml theme={null}
display_name = "Your app"
description = "your app"
readme = "./README.md"
```
The `readme` field points to a `README.md` file that will be rendered in the
Dashboard for each app and its installs.
**Configs** - List all config versions for an app
```sh theme={null}
nuon apps configs
```
**Runner-config** - Print the current runner config
```sh theme={null}
nuon apps runner-config
```
The output of the following 2 sub-commands are JSON so to improve readability,
use `jq` or `python`
```sh theme={null}
nuon apps | jq
nuon apps | python -m json.tool
```
**Sandbox-config** - Print the current sandbox config
```sh theme={null}
nuon apps sandbox-config
```
**Input-config** - Print the current input config
```sh theme={null}
nuon apps input-config
```
## App Metadata
You can add the following metadata to your app, which is used in
installers:
* `display_name`
* `description`
This metadata can be added via a `metadata.toml` config file in the app root directory:
```toml theme={null}
display_name = "Your app"
description = "your app"
readme = "./README.md"
```
The `readme` field points to a `README.md` file that will be rendered in the
Dashboard for each app and its installs.