This app can be found in the aws-lambda directory of the example-app-configs repository.
Prerequisites
- Signup for the self-service free trial. You will need a login and an org in Nuon’s cloud.
- Set up an AWS account. This is the account you will install the app in.
What You Will Create
This tutorial will walk you through creating the following:- An app
- Several components including a Lambda function, Docker image, DynamoDB table, Certificate and API Gateway
- An install, using our AWS minimal sandbox
We recommend you clone the
example-app-configs
repository which includes the
aws-lambda app versus creating each config file manually. This guide is
meant to explain the concepts behind some of the config files, so you can
create your own apps in the future.Configure App
To configure the app, you will create several TOML config files. In each section below we will provide you with configuration snippets for the app itself as well as it’s components.Create App
Clone theexample-app-configs repository, cd into the aws-lambda directory,
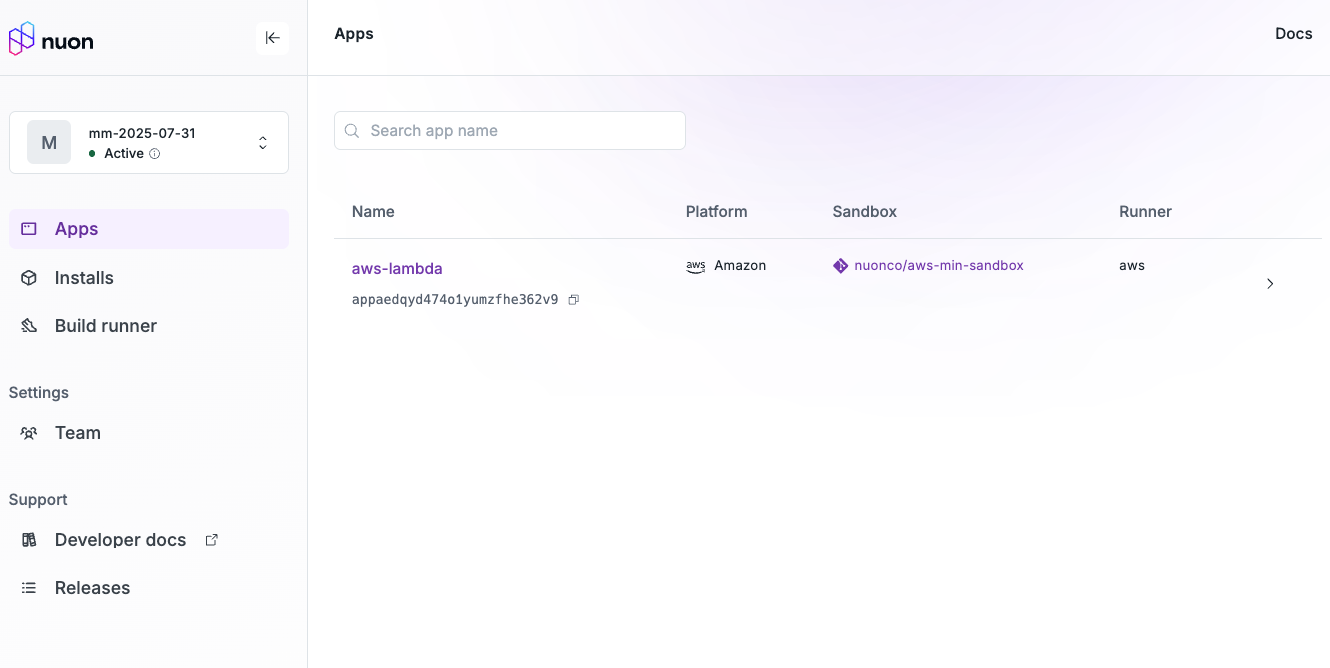
and create the app in Nuon. This will create the app in app.nuon.co
Inputs
Inputs are customer-specific configs that are entered when you install the App in the customer’s cloud account. They will be displayed in the dashboard. Inputs are optional. In the app root directory, notice the file namedinputs.toml:
inputs.toml
nuon.run and a second-level subdomain for the API Gateway service
that will be deployed in the customer’s AWS account. The customer will be
prompted to enter these values when they create an install of the app. For this
tutorial, you can accept the defaults.
Sandbox
Nuon provides a set of Nuon Managed Sandboxes that can be used to provision the infrastructure needed for your app. Theaws-min-sandbox
is very streamlined compared to the Kubernetes sandboxes so will provide DNS
delegation needed for nuon.run.
Your app references these Sandboxes in the sandbox.toml file.
In the app root directory, notice the file named sandbox.toml:
sandbox.toml
enable_nuon_dns set to true, the sandbox will create a Route53 DNS zone
for the install, allowing you to access the services deployed in the customer’s
AWS account using a Nuon-managed nuon.run domain. The config uses the install
id as the subdomain, which will be unique for each install.
Components
Components are the building blocks of your app and where a software vendor’s application is installed on top of the sandbox infrastructure. In this example, there are several components that make up the AWS Lambda app, including:- A Docker image with a Dockerfile and Go app stored in ECR
- A DynamoDB table to store data
- A Lambda function to process requests
- An API Gateway to expose the Lambda function to the internet
- A Certificate to secure the API Gateway
components directory. Notice there
are several files here, one for each component. Numbers are prefixed to the file
names to easily show the dependency order.
The Docker build component creates a container image including the Go
application code and pushes it to ECR.
0-docker-image.toml
1-dynamodb-table.toml
2-lambda-function.toml
3-certificate.toml
4-api-gateway.toml
Sync App to Nuon
You now have a complete Nuon app. This is a good place to stop and sync it to Nuon. Make sure you are in the root directory of your app, then run: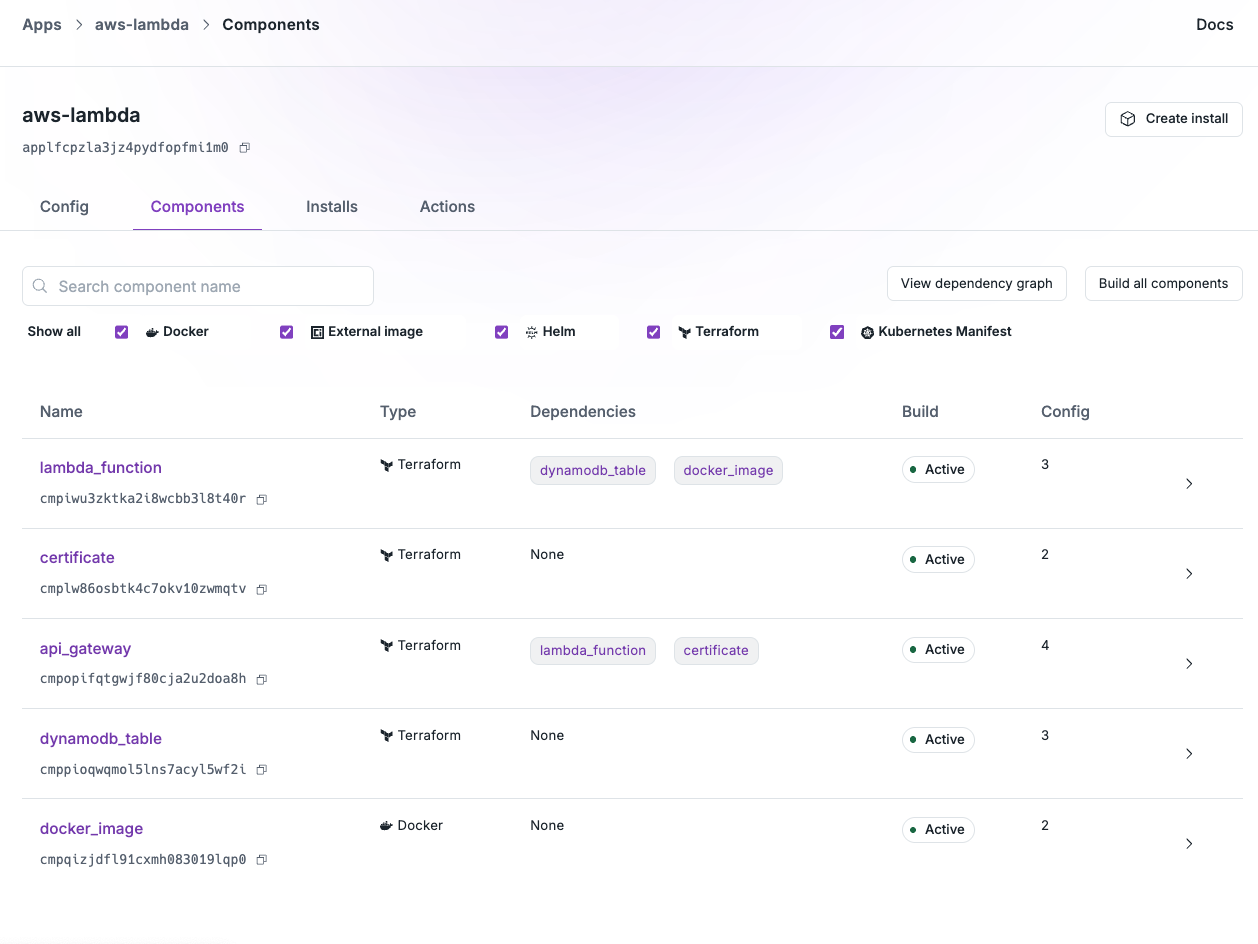
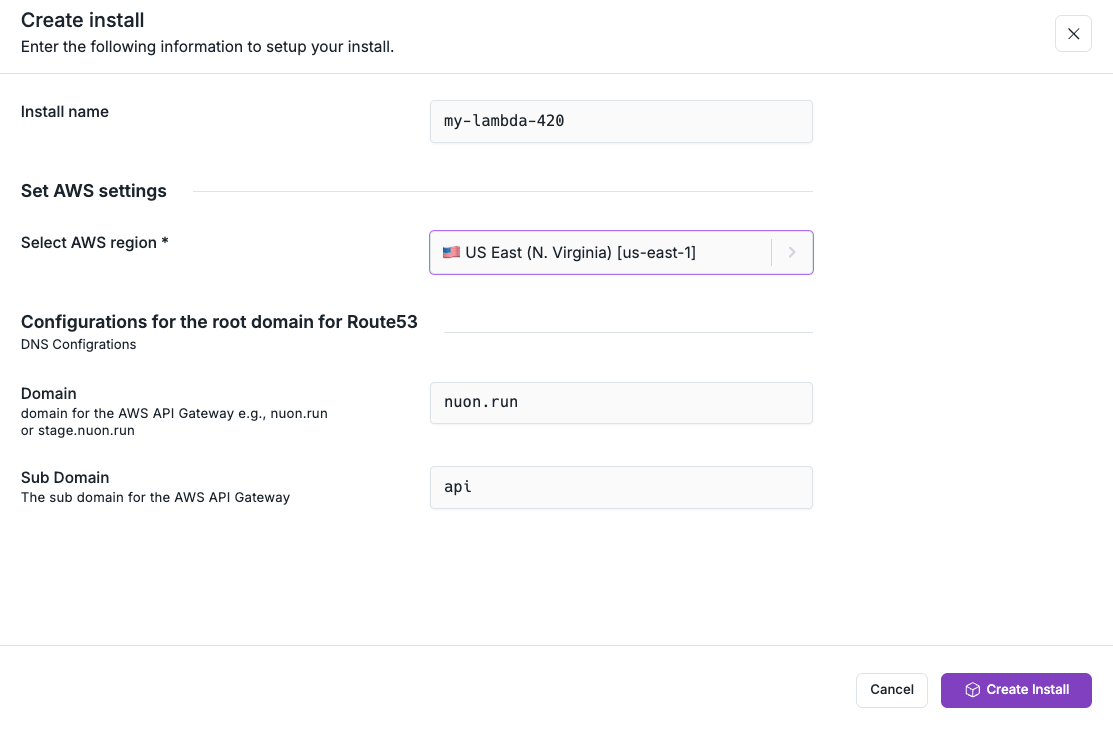
Create an Install
Click the Create Install button in the top right corner of the app page in the Dashboard. Give your install a name choose the AWS Region. Notice the inputs you defined in theinputs.toml file are displayed here,
allowing the customer to enter their own values. Just accept the defaults for
this tutorial.
Click the Create Install button at the bottom of the page to start the Workflow.
The provision workflow generates two install stack formats — a CloudFormation
Quick-Create / CLI snippet, and Terraform inputs.auto.tfvars and secrets.auto.tfvars files for the
install-stacks/aws module — so the
customer can apply whichever fits their tooling.
Monitoring Installs
As soon as you kick off the install provisioning, you should see the new install’s workflow in the dashboard.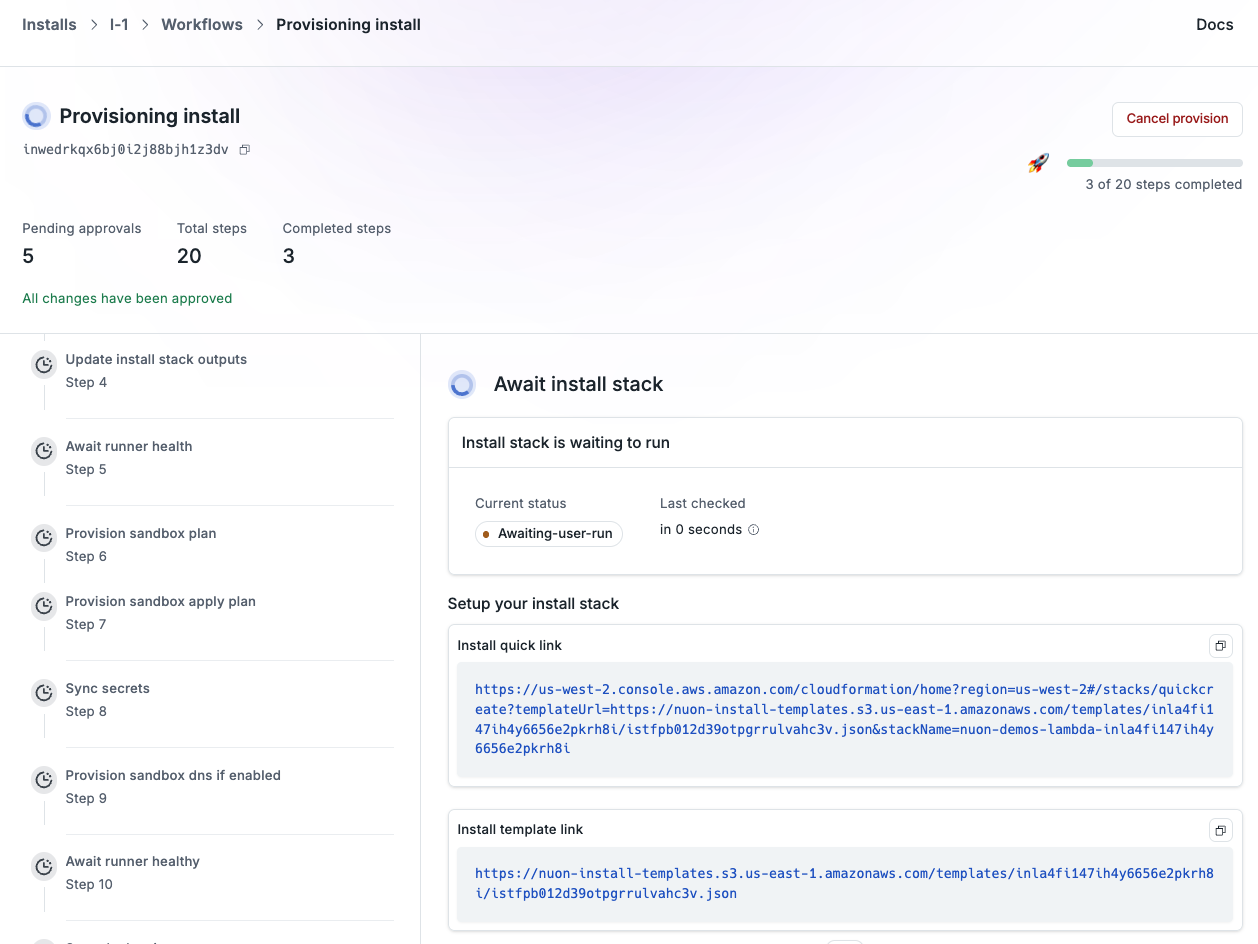
Apply the Install Stack in AWS
In this step, you are switching personas, from the software vendor, to the end customer, authorizing the install of the app in your cloud account. Apply the install stack using whichever format fits your workflow. Either way, the resulting resources are the same: a VPC, the IAM policies Nuon expects, an Autoscaling Group, and a VM running the Nuon Build Runner that will provision the install of your app.Option A: CloudFormation
Click or copy the CloudFormation Quick-Create link to open it in your AWS account, log in, scroll to the bottom, accept the defaults, and click Create Stack.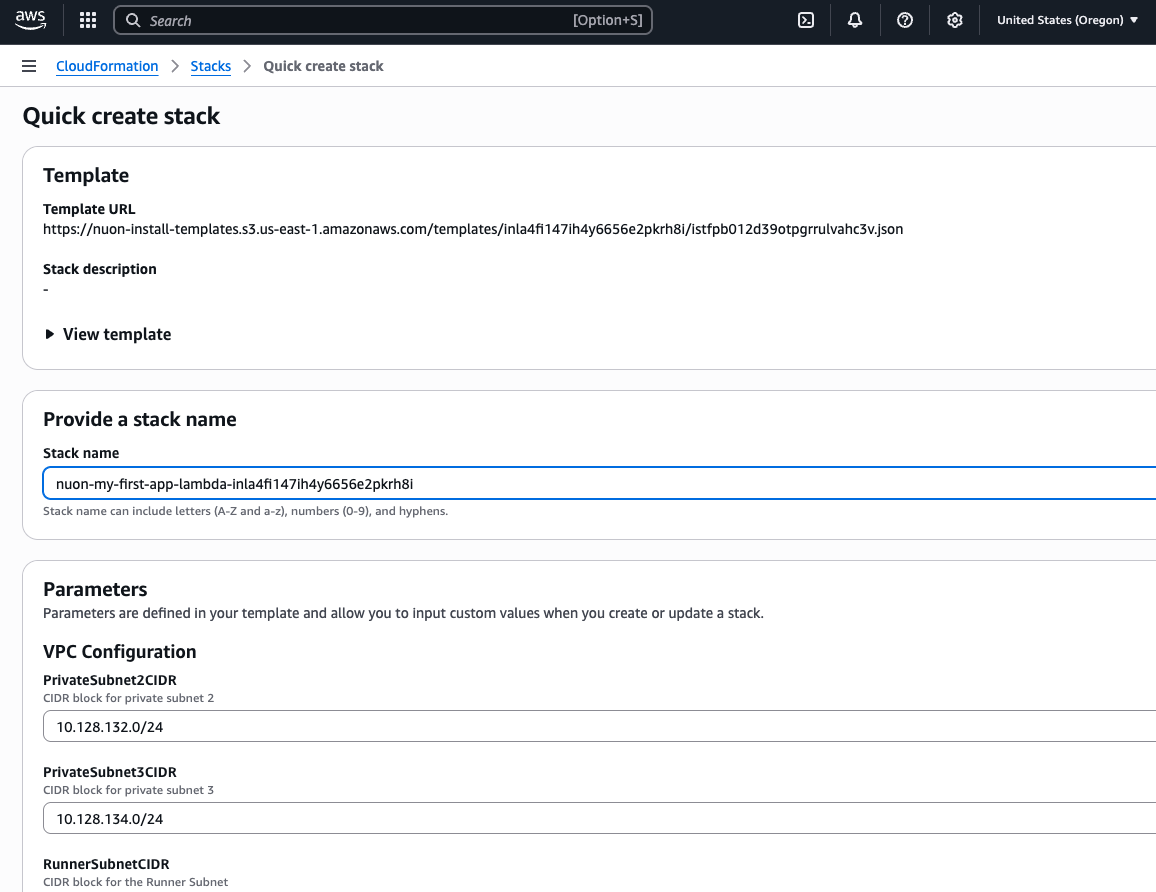
Option B: Terraform
Download the generatedinputs.auto.tfvars and secrets.auto.tfvars files from the
dashboard, set up a backend.tf (snippet provided in the dashboard), and run:
install-stacks/aws module.
Monitor the Install Stack creation in AWS
Monitor the stack creation in the AWS console (CloudFormation) or the Terraform output. This will take a few minutes to complete. You can also pull up the AWS EC2 console and see the EC2 VM appear at some point with the install id in its name. The Nuon Dashboard will not provide feedback until the runner is up and connected to Nuon.
Monitor the Remainder of the Install Workflow
If plan steps require approvals, you will need to approve them in the dashboard. You can also monitor the progress of the install in the dashboard.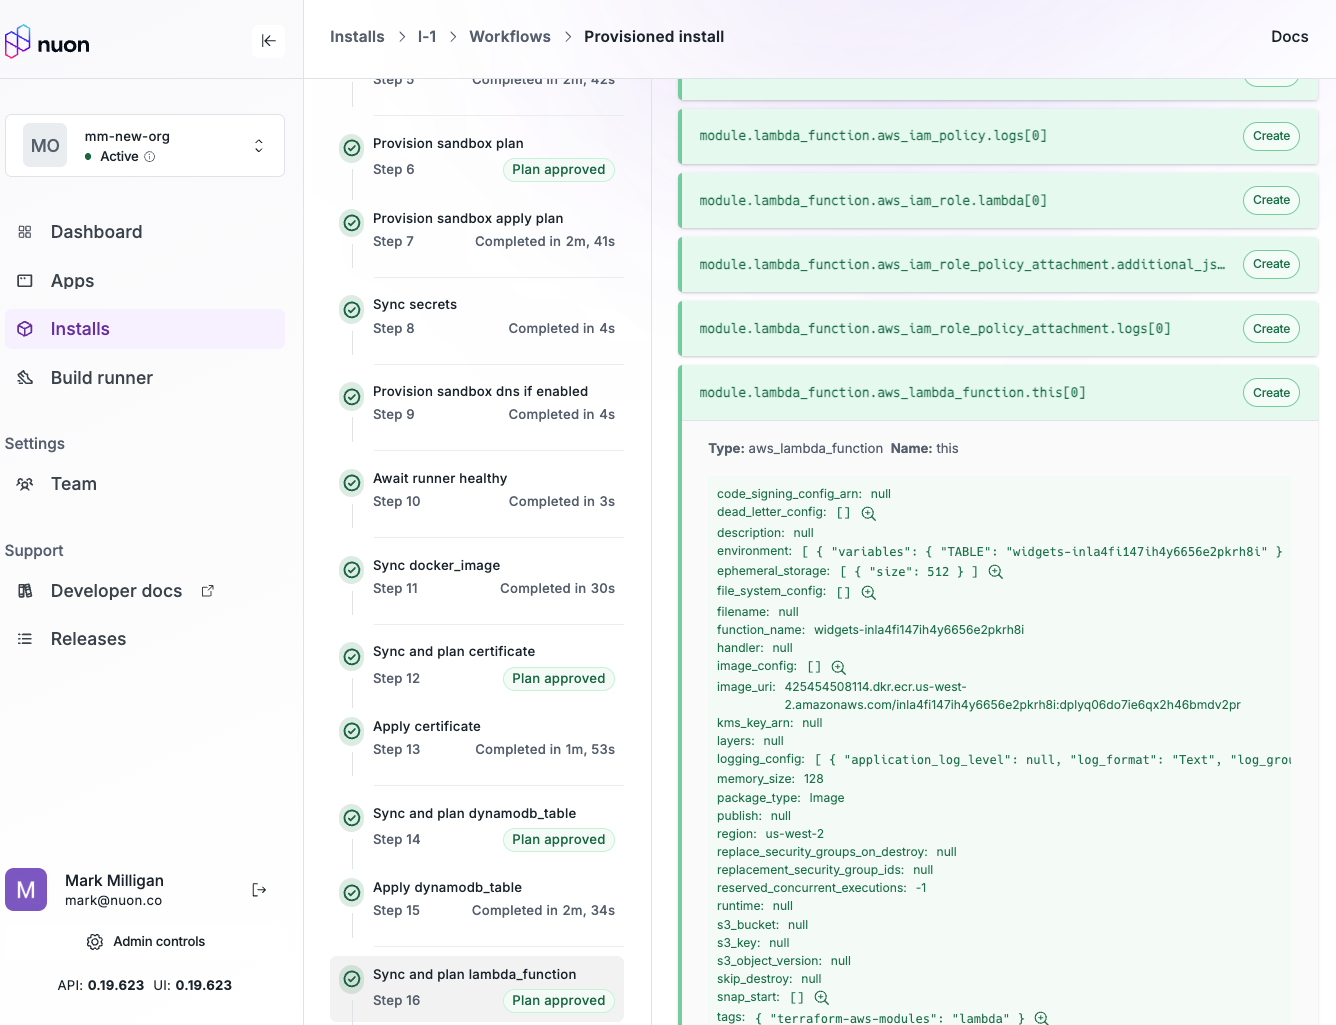
Inspect the Install
When the install has provisioned, and the deploys have completed, click the URL link in the Install’s README.md visible on the install page in the dashboard. Alternatively, copy the link and open a terminal and curl the API to verify it’s running.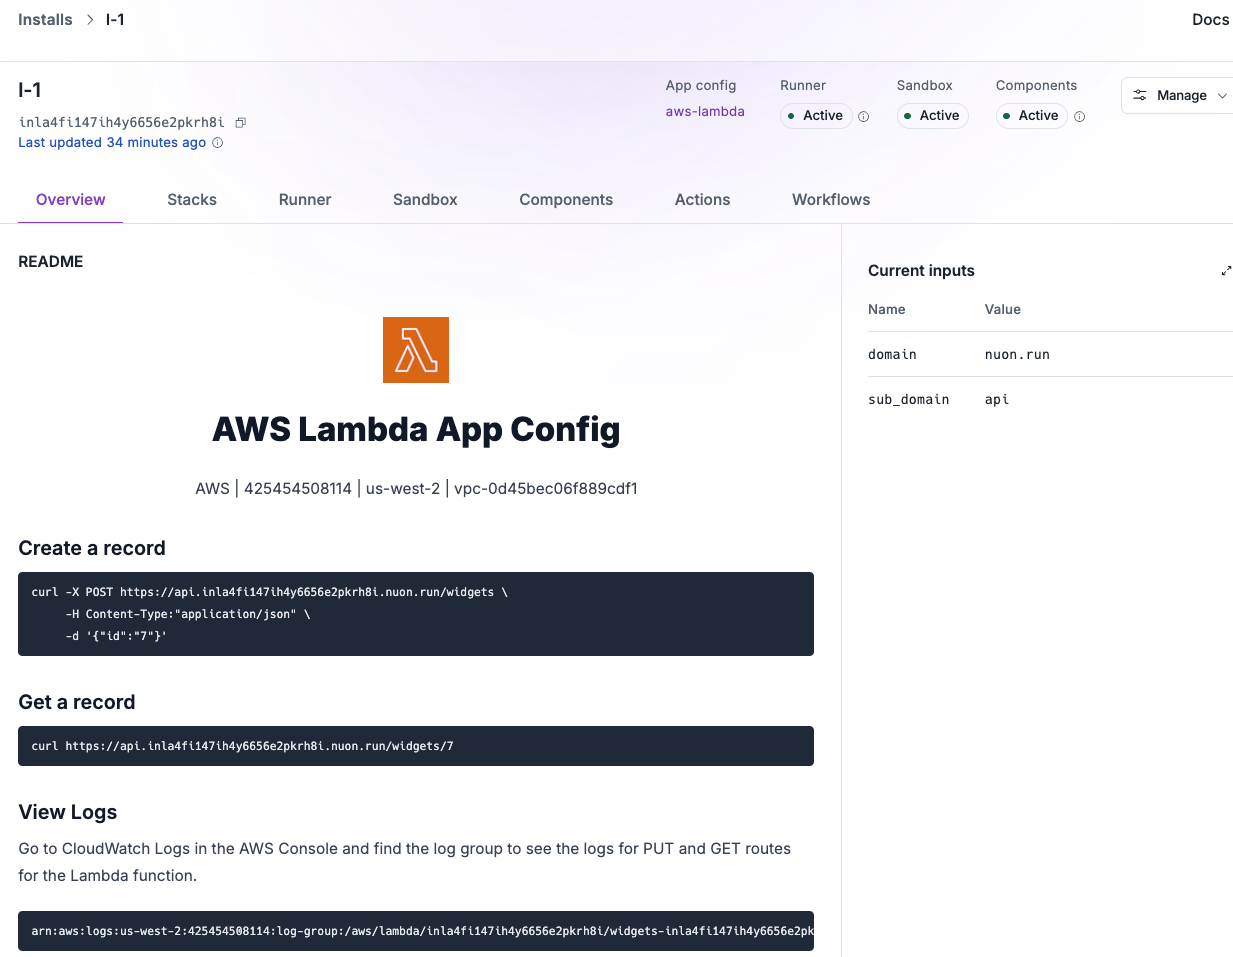
Create a Widget record in DynamoDB via a Lambda function
Retrieve a Widget record from DynamoDB via a Lambda function
Verify the widget record was created with the GET request: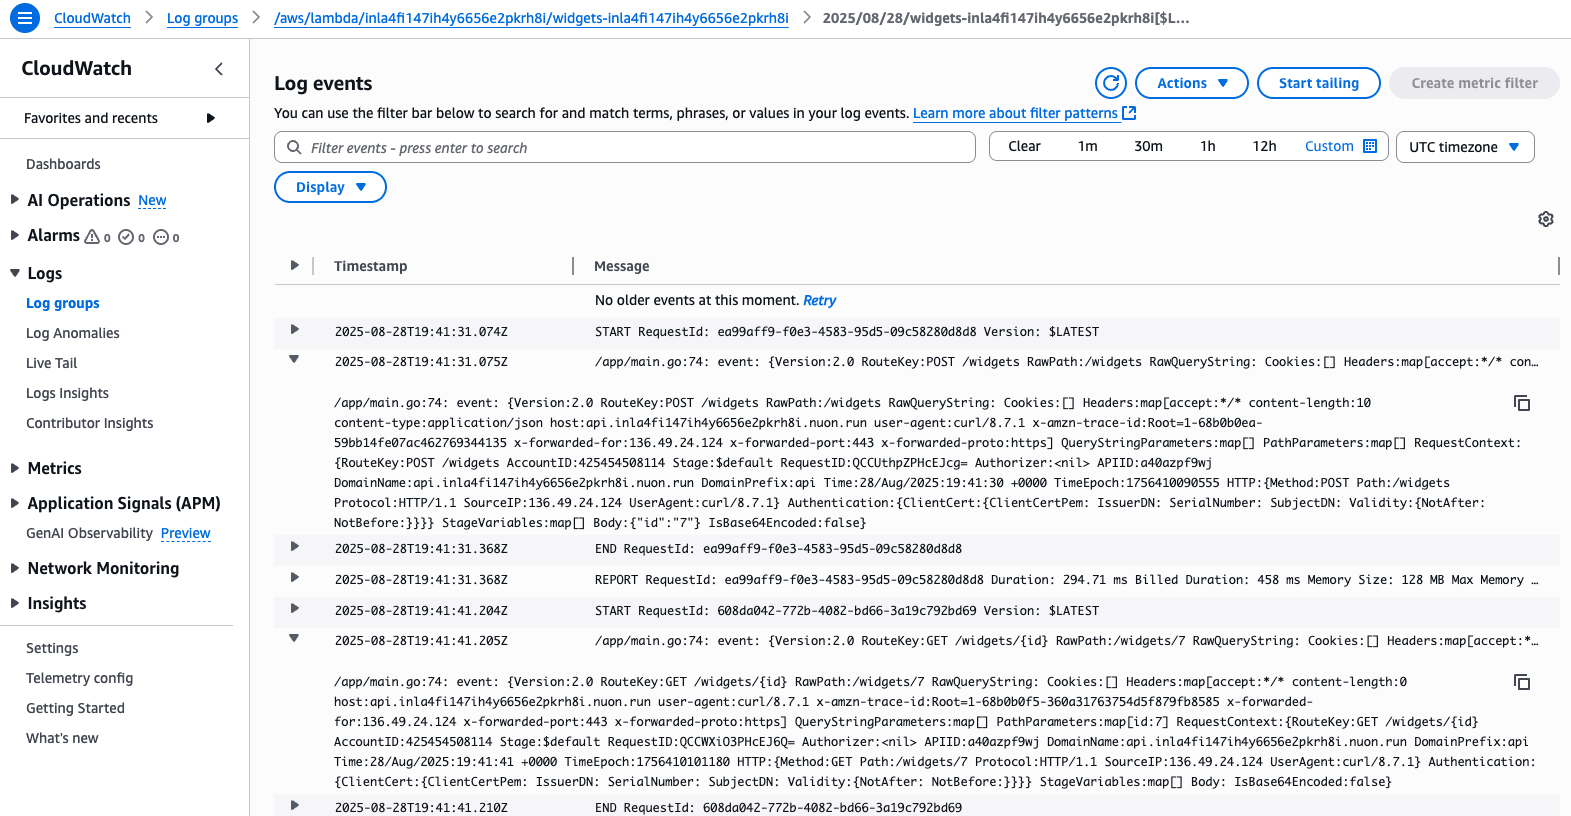
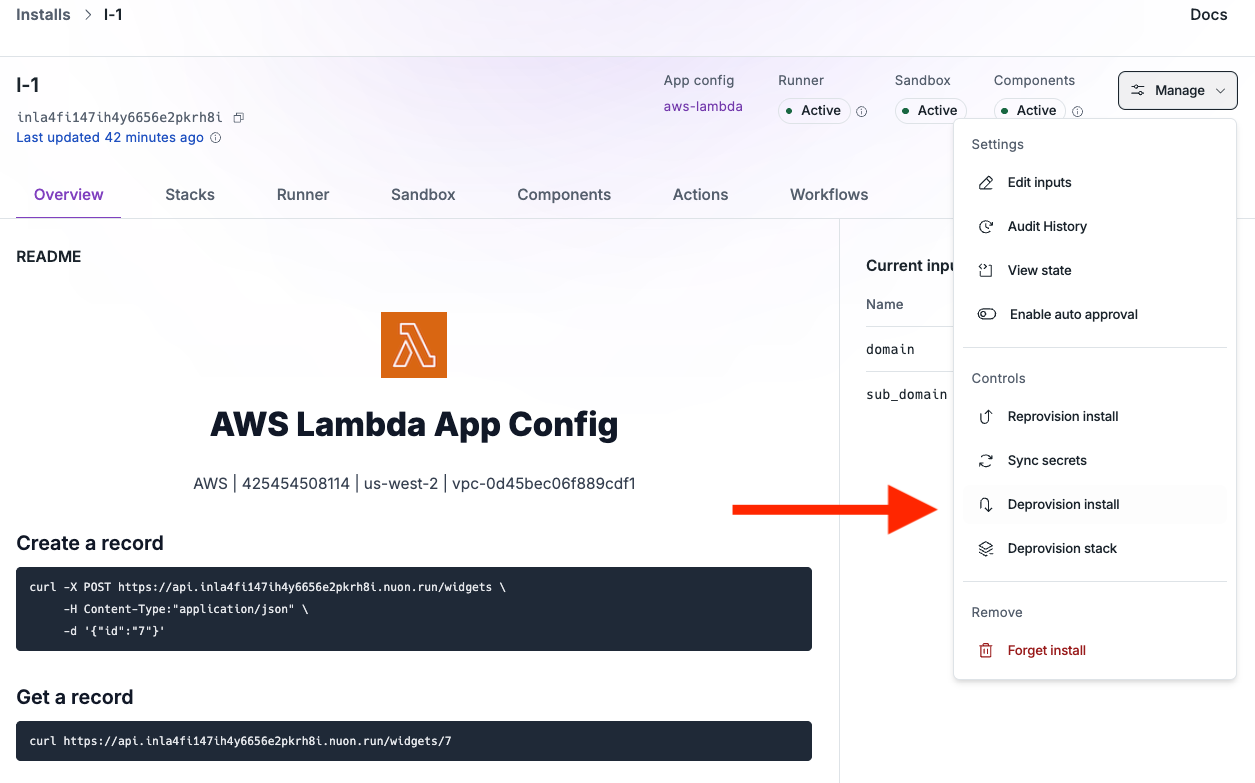
Deprovision the Install
Nuon is mindful of your public cloud spend, so provide the following deprovisioning steps. Deprovisioning the install is a two-step process. First, you need to deprovision the install in the Nuon dashboard, which will deprovision the resources to install your app. Once that is completed successfully, tear down the install stack — delete the CloudFormation stack in the AWS console, or runterraform destroy against the install module — to
remove the runner by destroying the EC2 VM, ASG, and VPC.
Be sure to back up any data you want to keep before deprovisioning the
install, as this will delete all resources created by the install.
Manually Deprovision the Install
If deprovisioning the install in the dashboard fails, tearing down the install stack — deleting the CloudFormation stack in AWS, or runningterraform destroy
against the install module — will delete all of the component resources and the
VPC.
Wrapping Up and Next Steps
Congratulations, you just deployed an app to AWS! A few suggestions for where to go next:- Review other example apps in the example-app-configs repository to see how to deploy a more complex app.
- Dig into our app guide to learn how to configure more complex apps.