Getting Started
Connect your Org
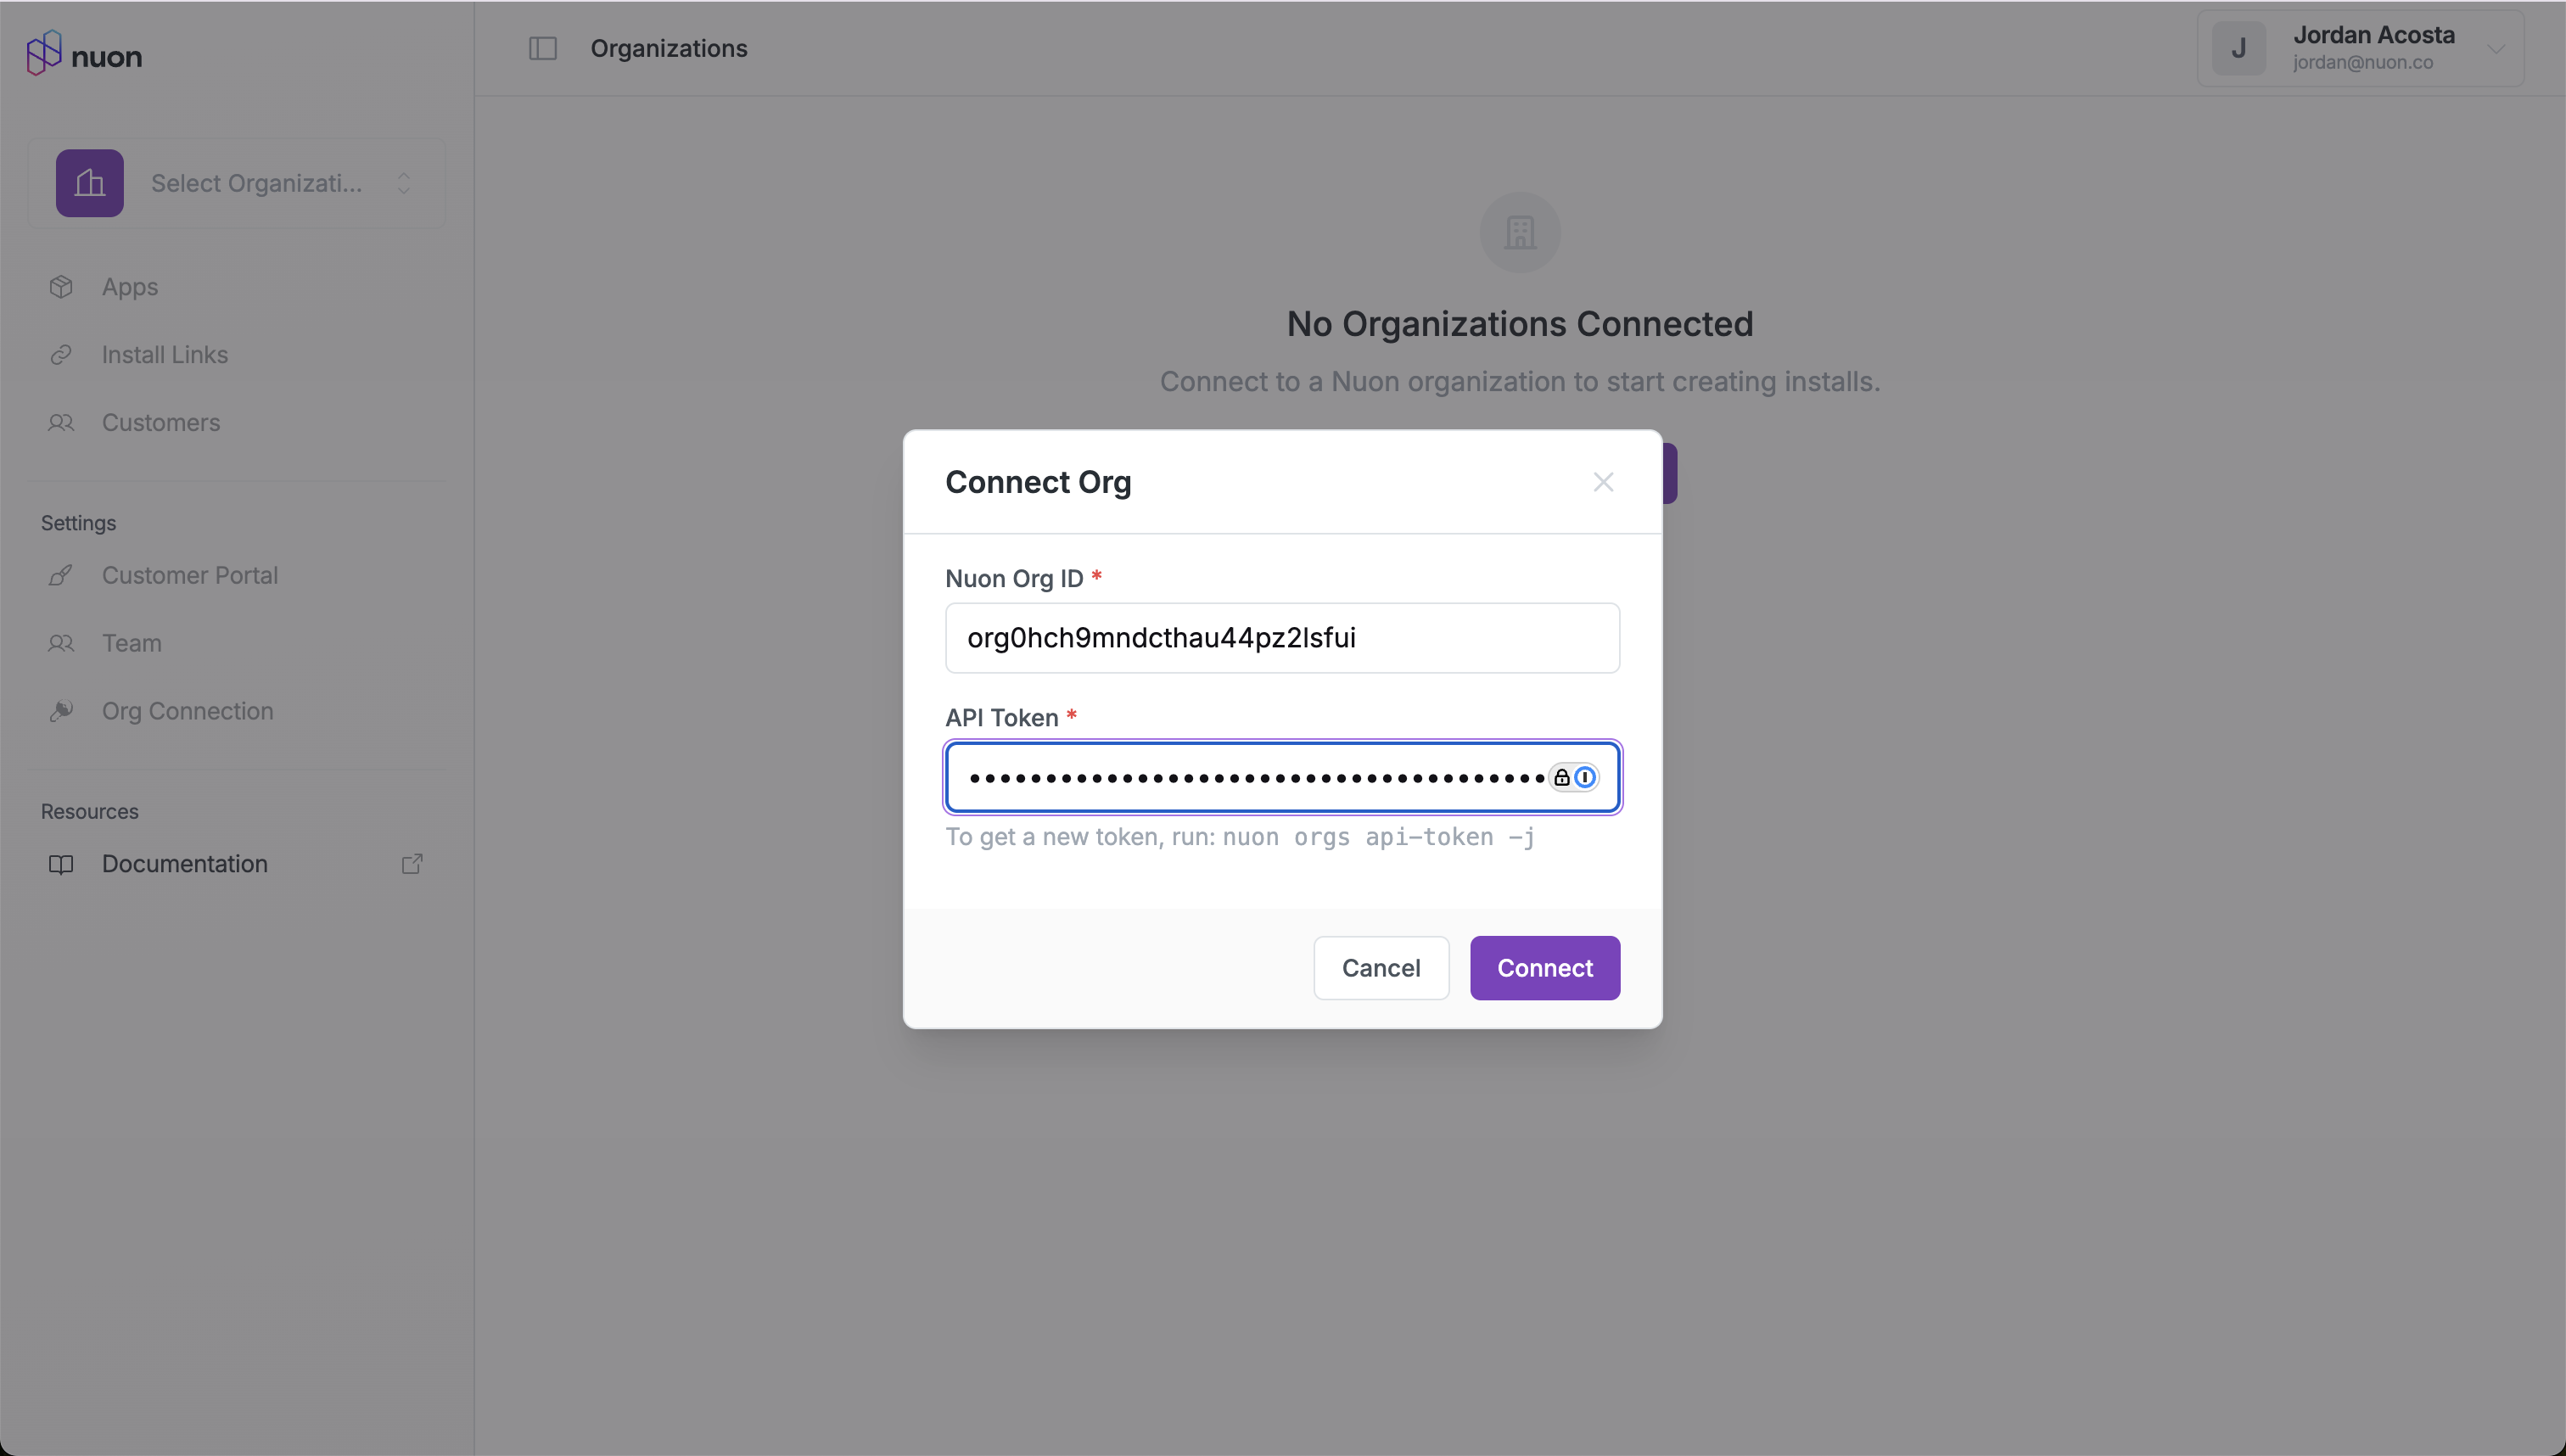
The first step is to connect the Portal to your Nuon org, so it can access your app and install data. You will need the org ID and an API token. You can create an API token using the Nuon CLI.The API token will be used to fetch data from the API for customer-facing pages.

Configure your App
In the settings for each app, configure what customers will see during the installation process.Inputs
In the input settings, configure what inputs customers will see on the install creation form.
Health Checks
In the health check settings, select the actions you want to use as health checks for that app. They will be used to determine when the app is ready for customer to use.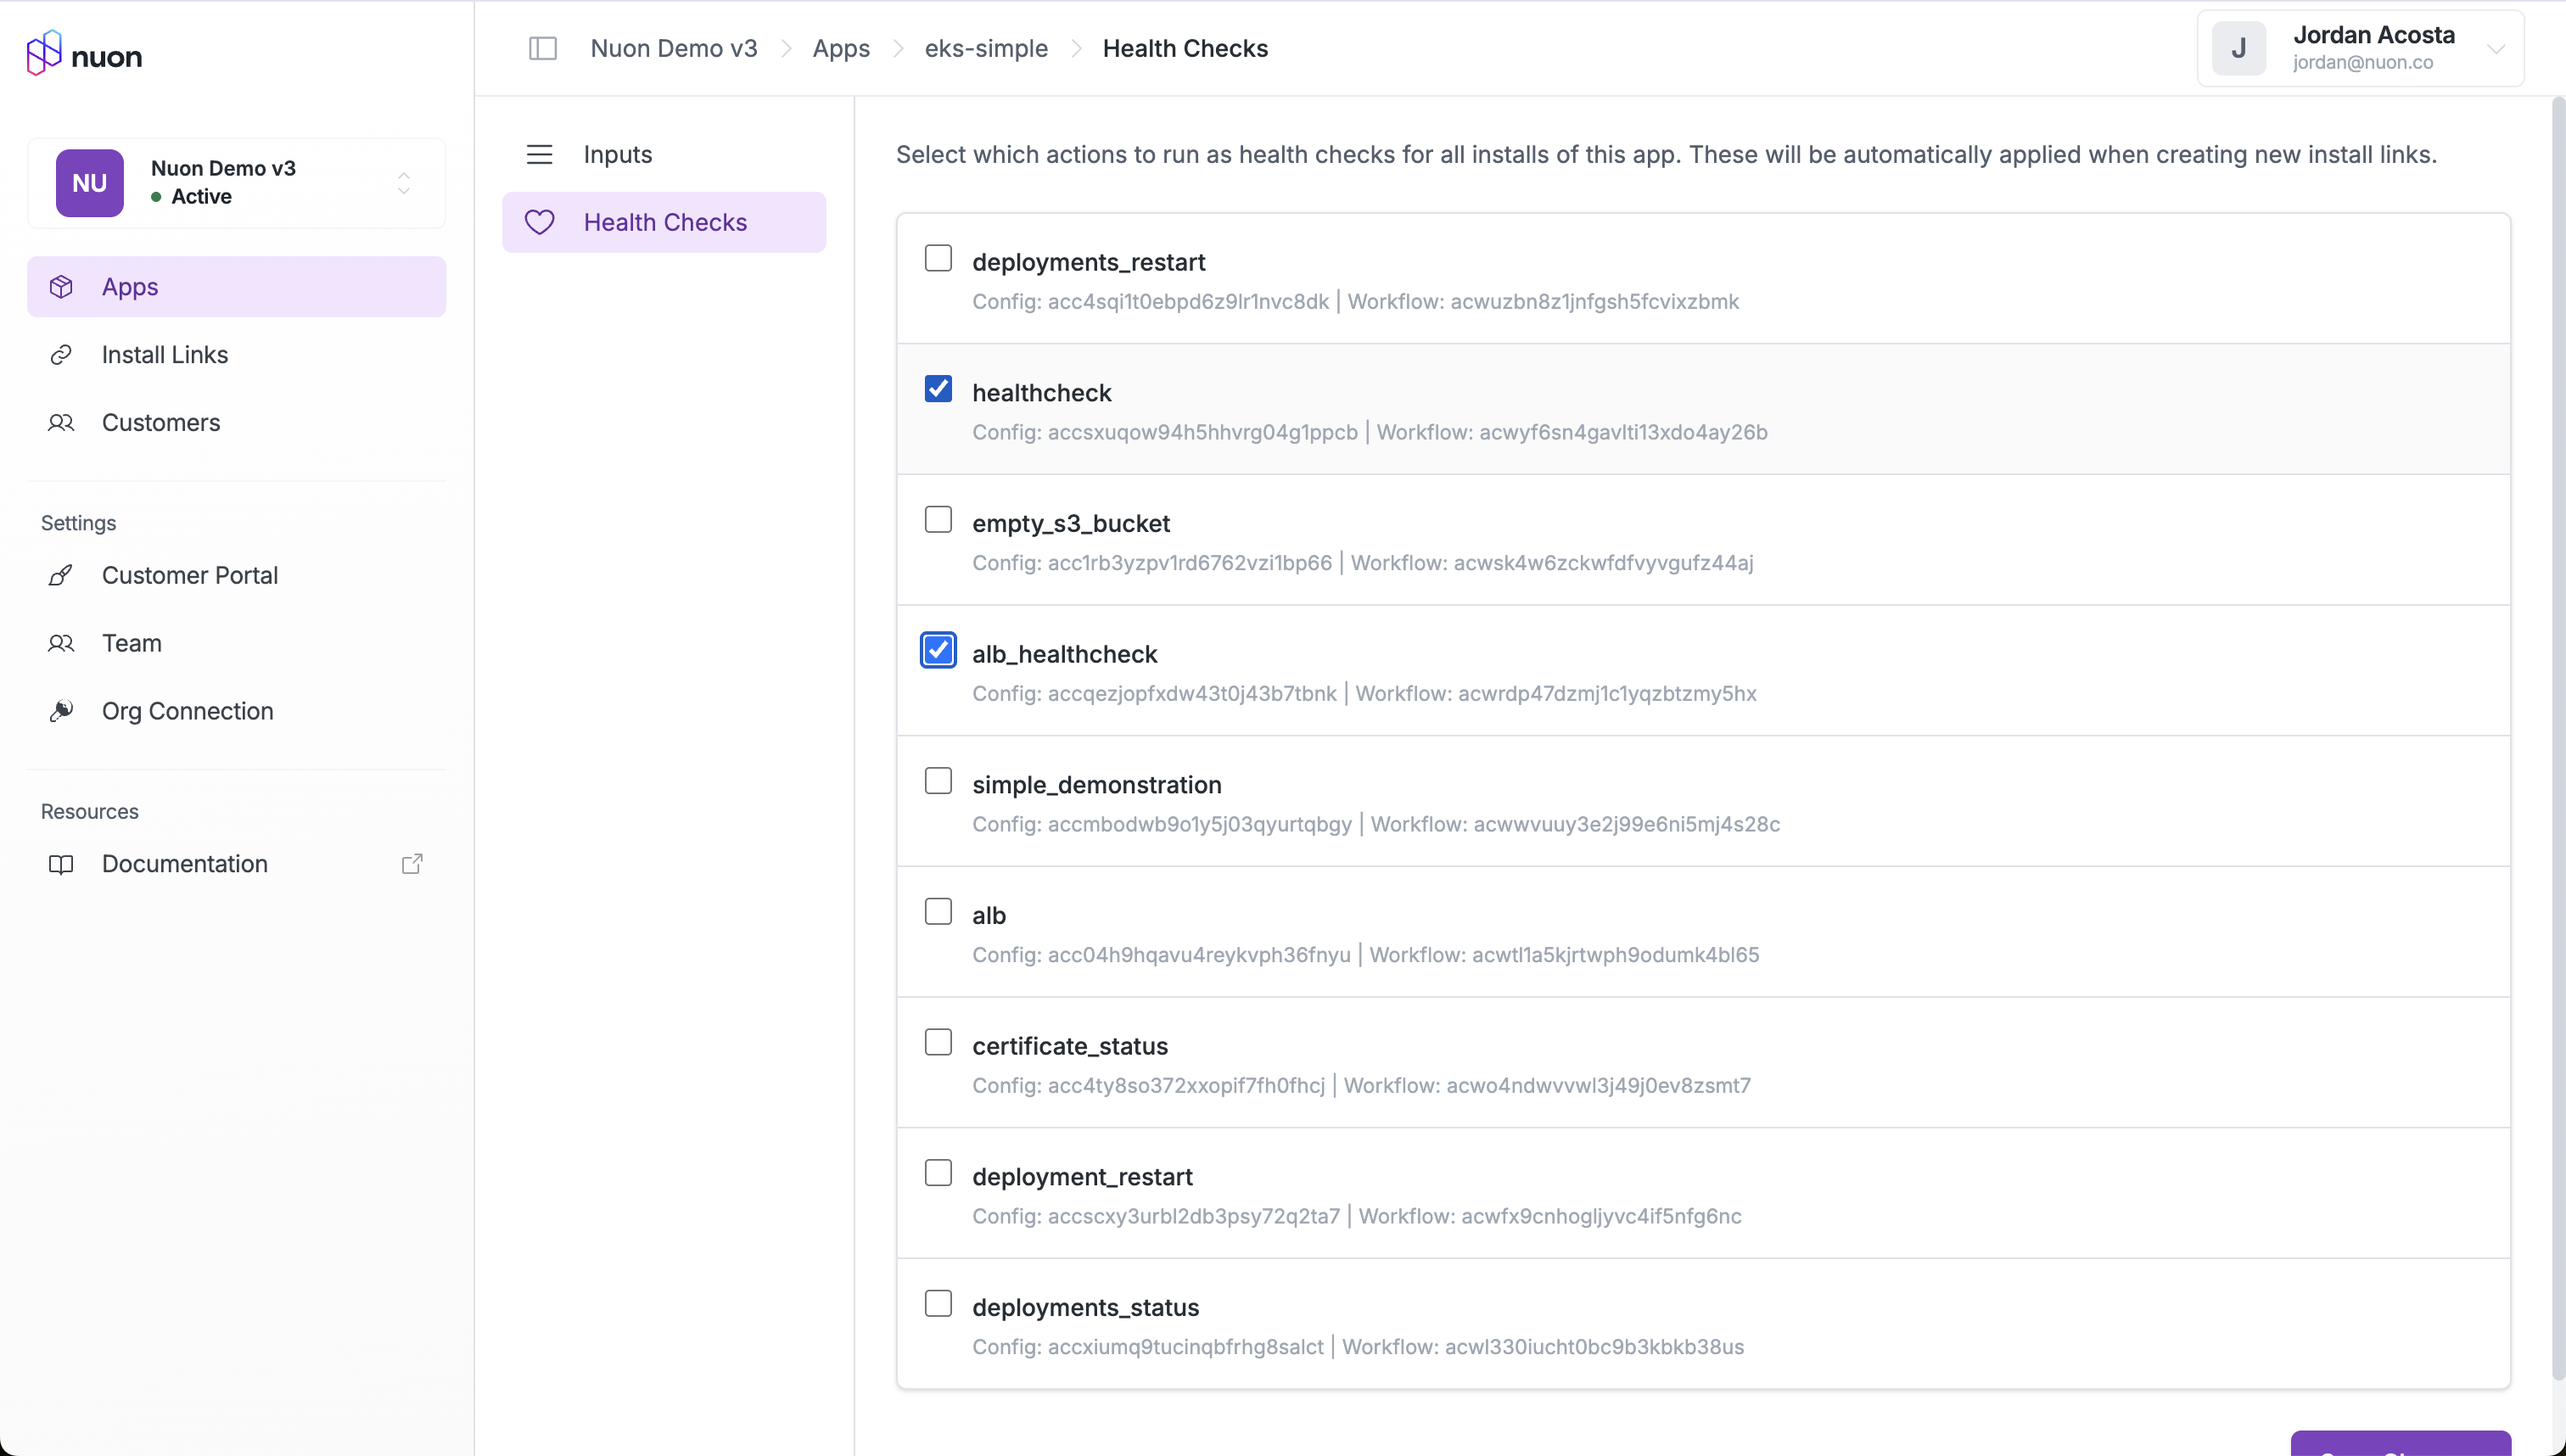
Configure the Portal
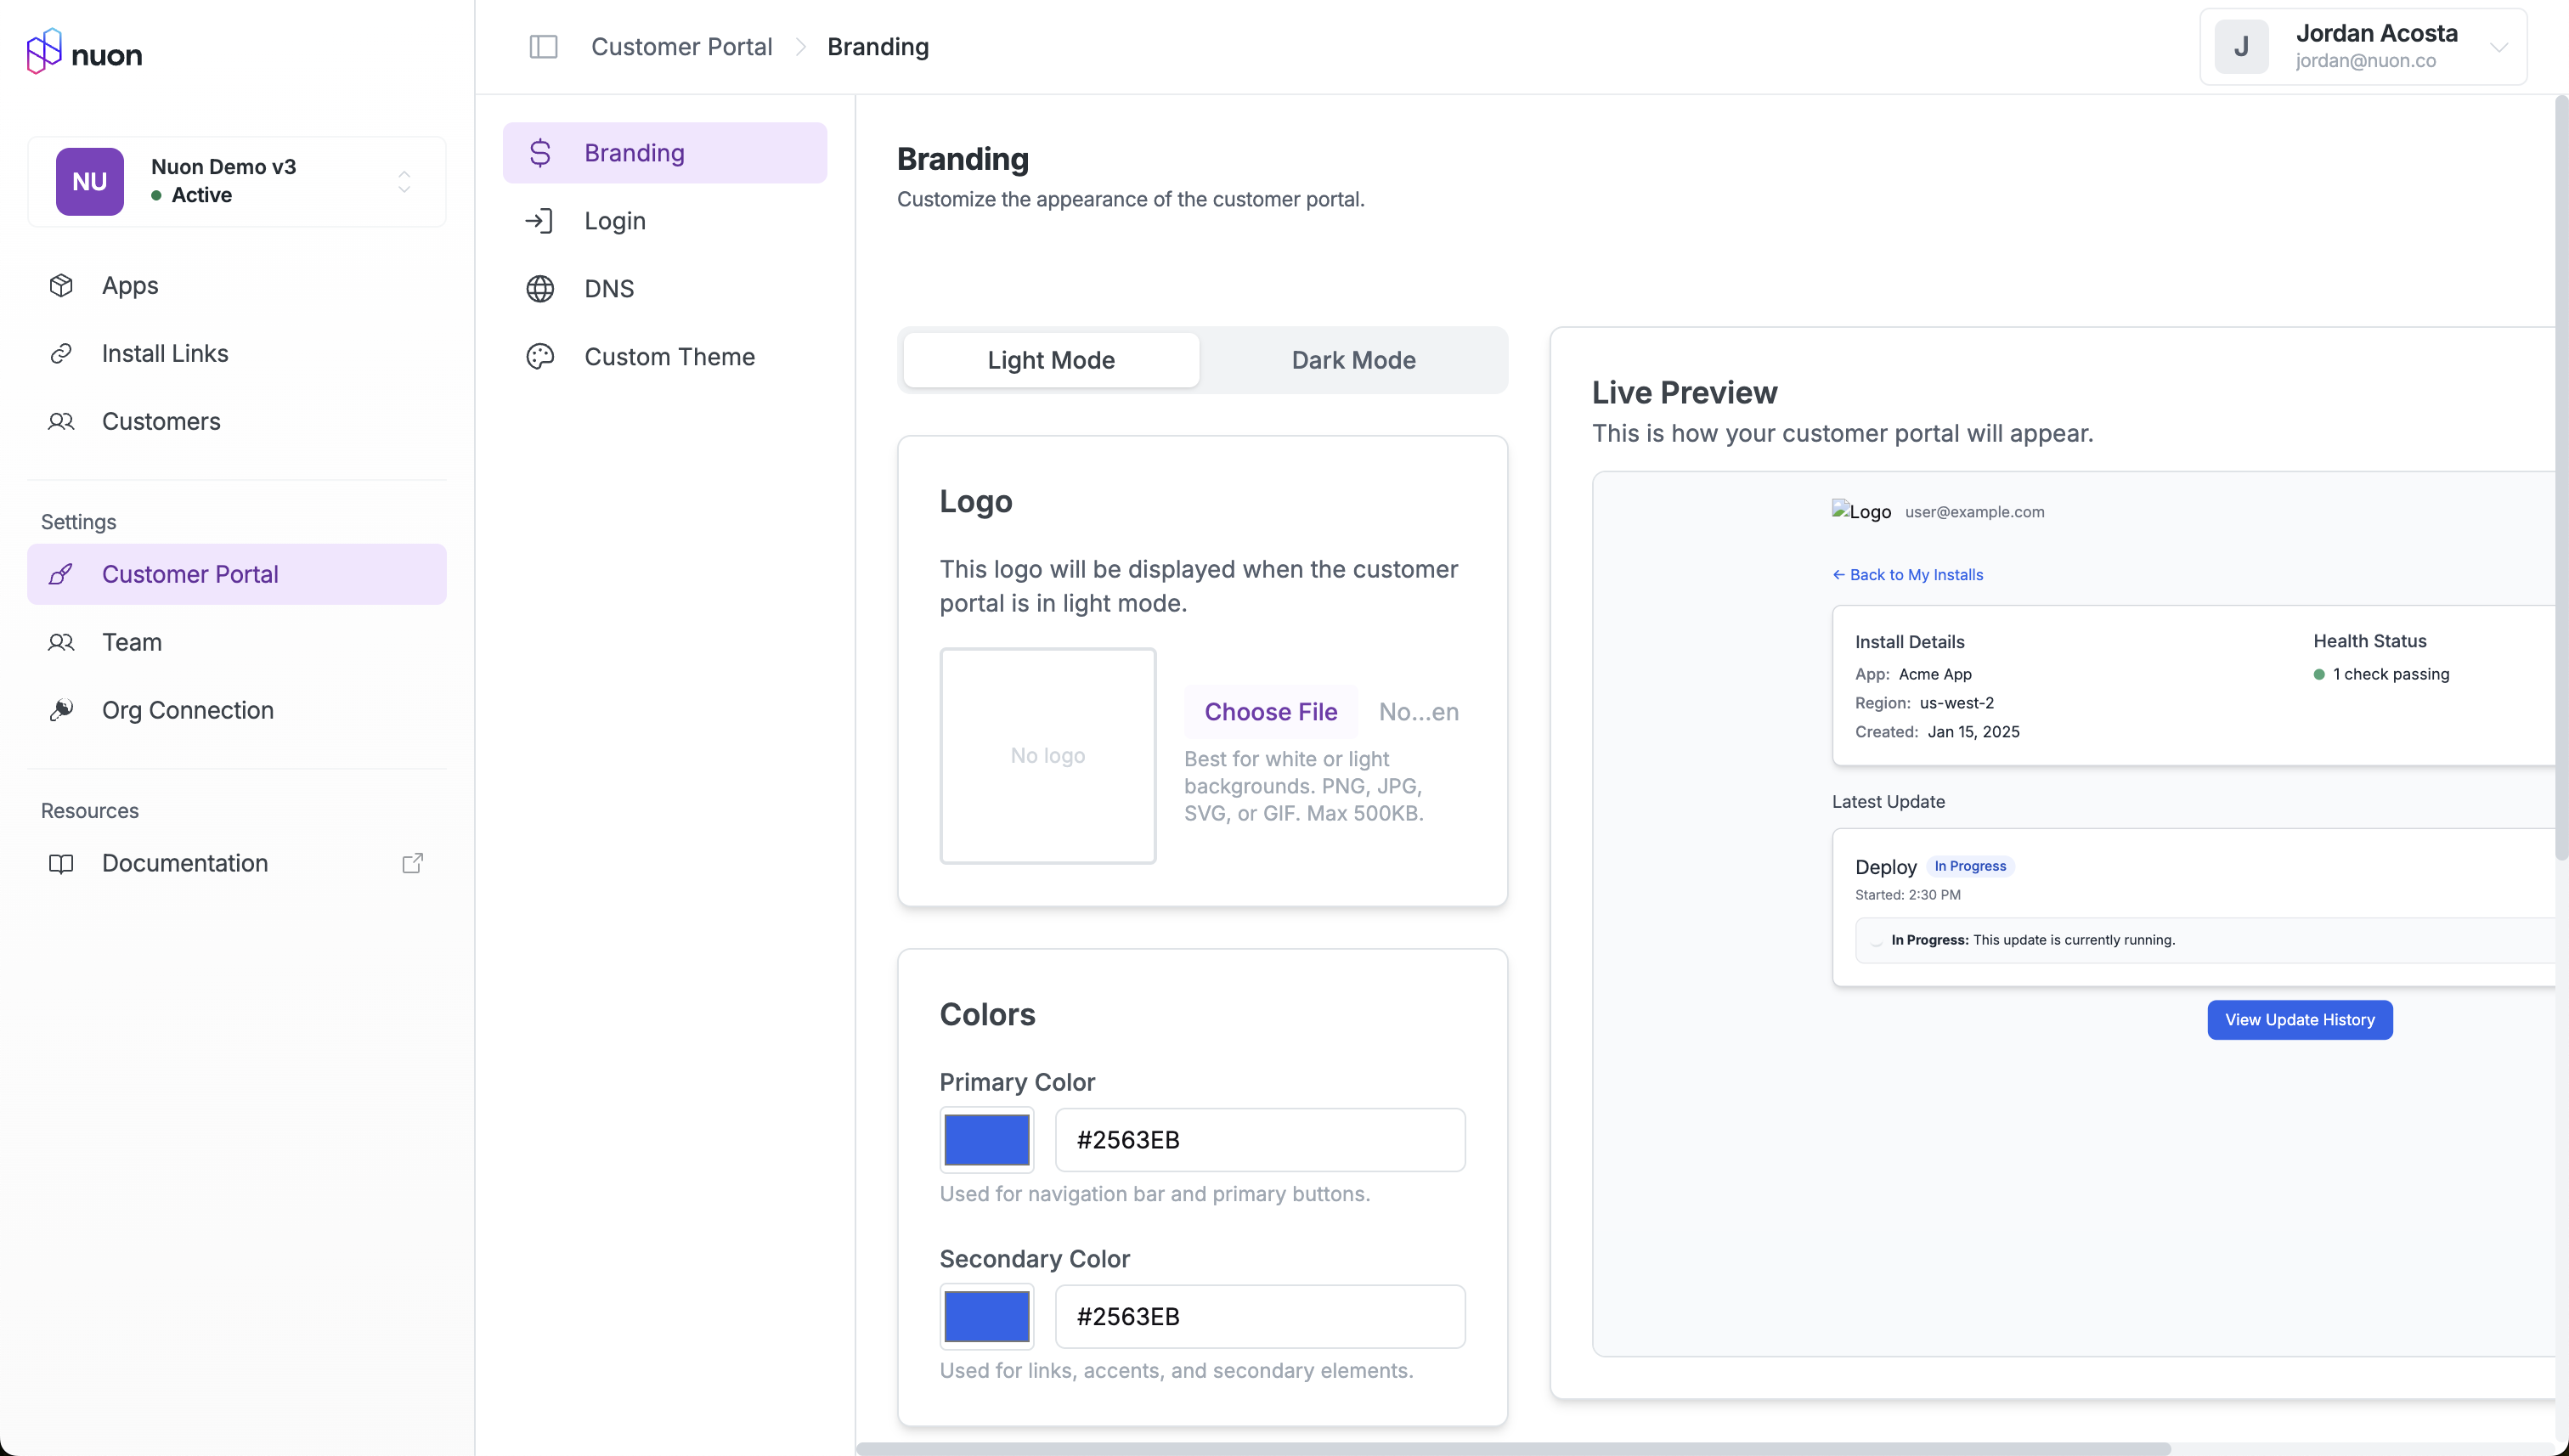
Each connected org is given it’s own portal, hosted athttps://<your-org-name>.customers.nuon.co. This is where your customers will login to manage their installs. In the Customer Portal settings, you can configure branding, login, and the subdomain. You can also create a custom theme if you want full control over the look and feel.
Invite Customers
Once your org is connected and your apps configured, you are ready to start inviting customers to install your app.Create an Install Link
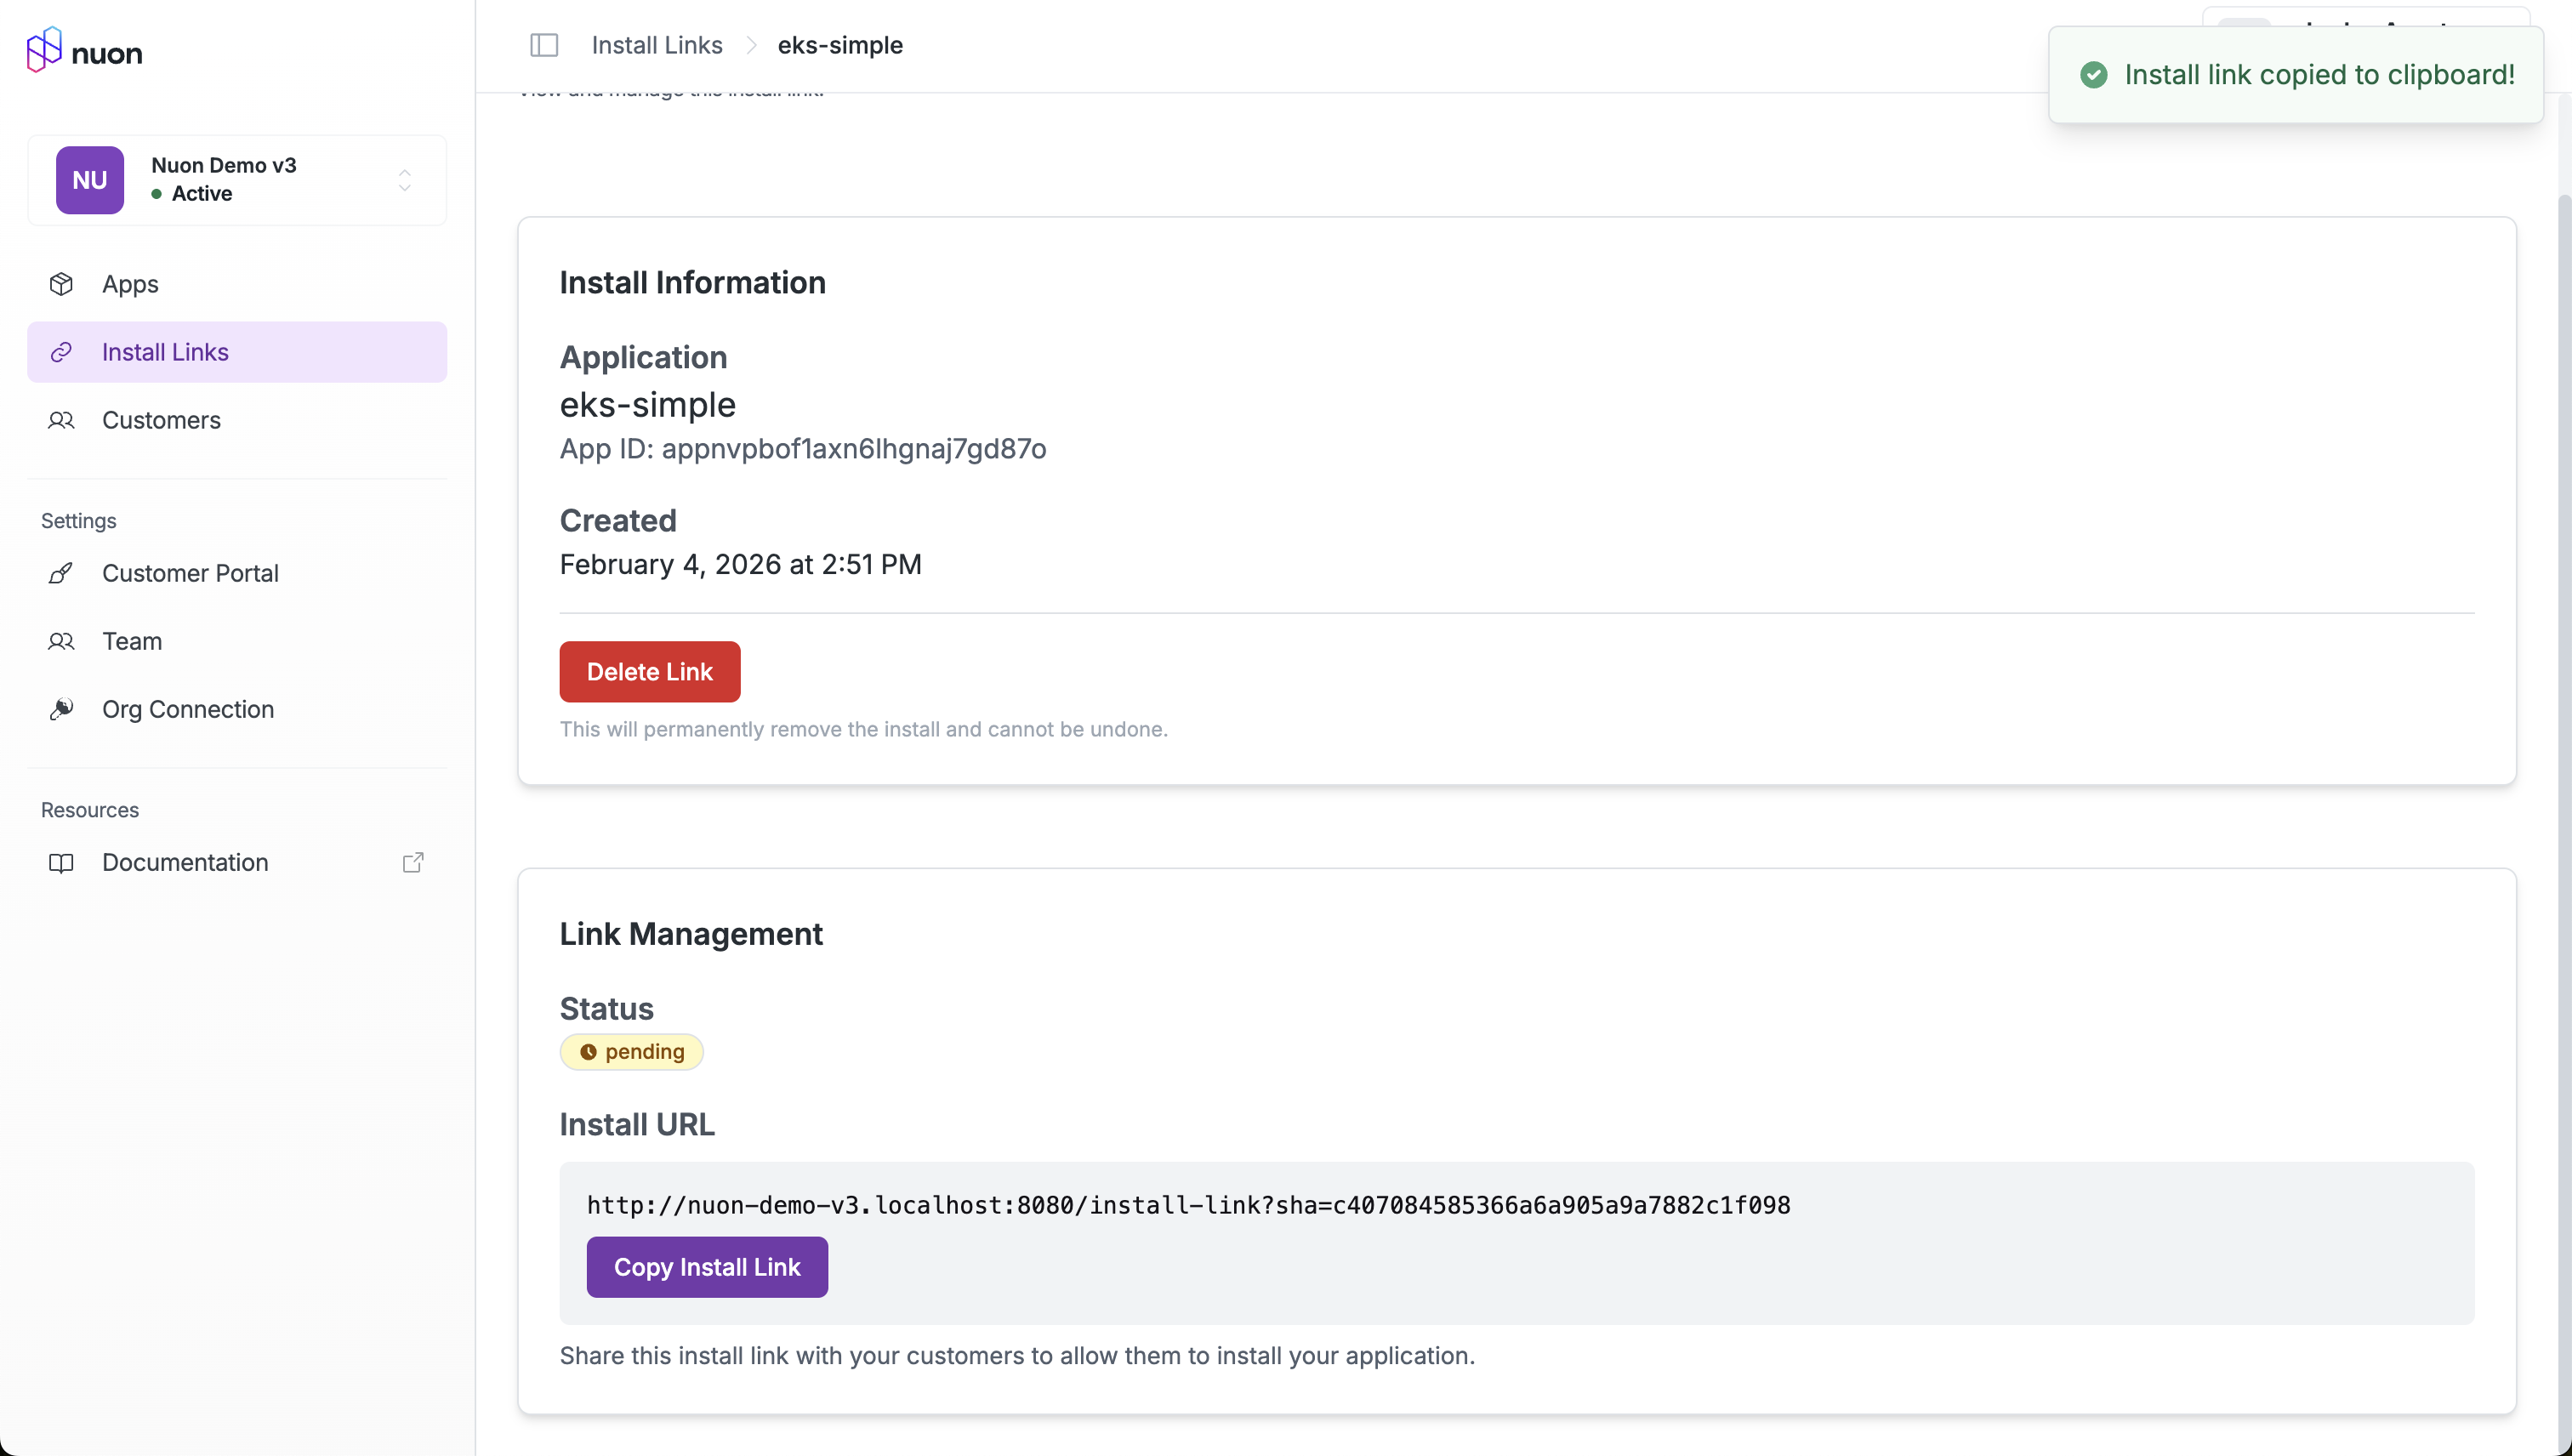
Install links are how you invite your customers to install your app. Install links are single-use. To create an install link, go to the Install Links page and click “Create Link”. Select the app you want to create a link for, fill out any inputs that aren’t customer-facing, and click “Create Link”.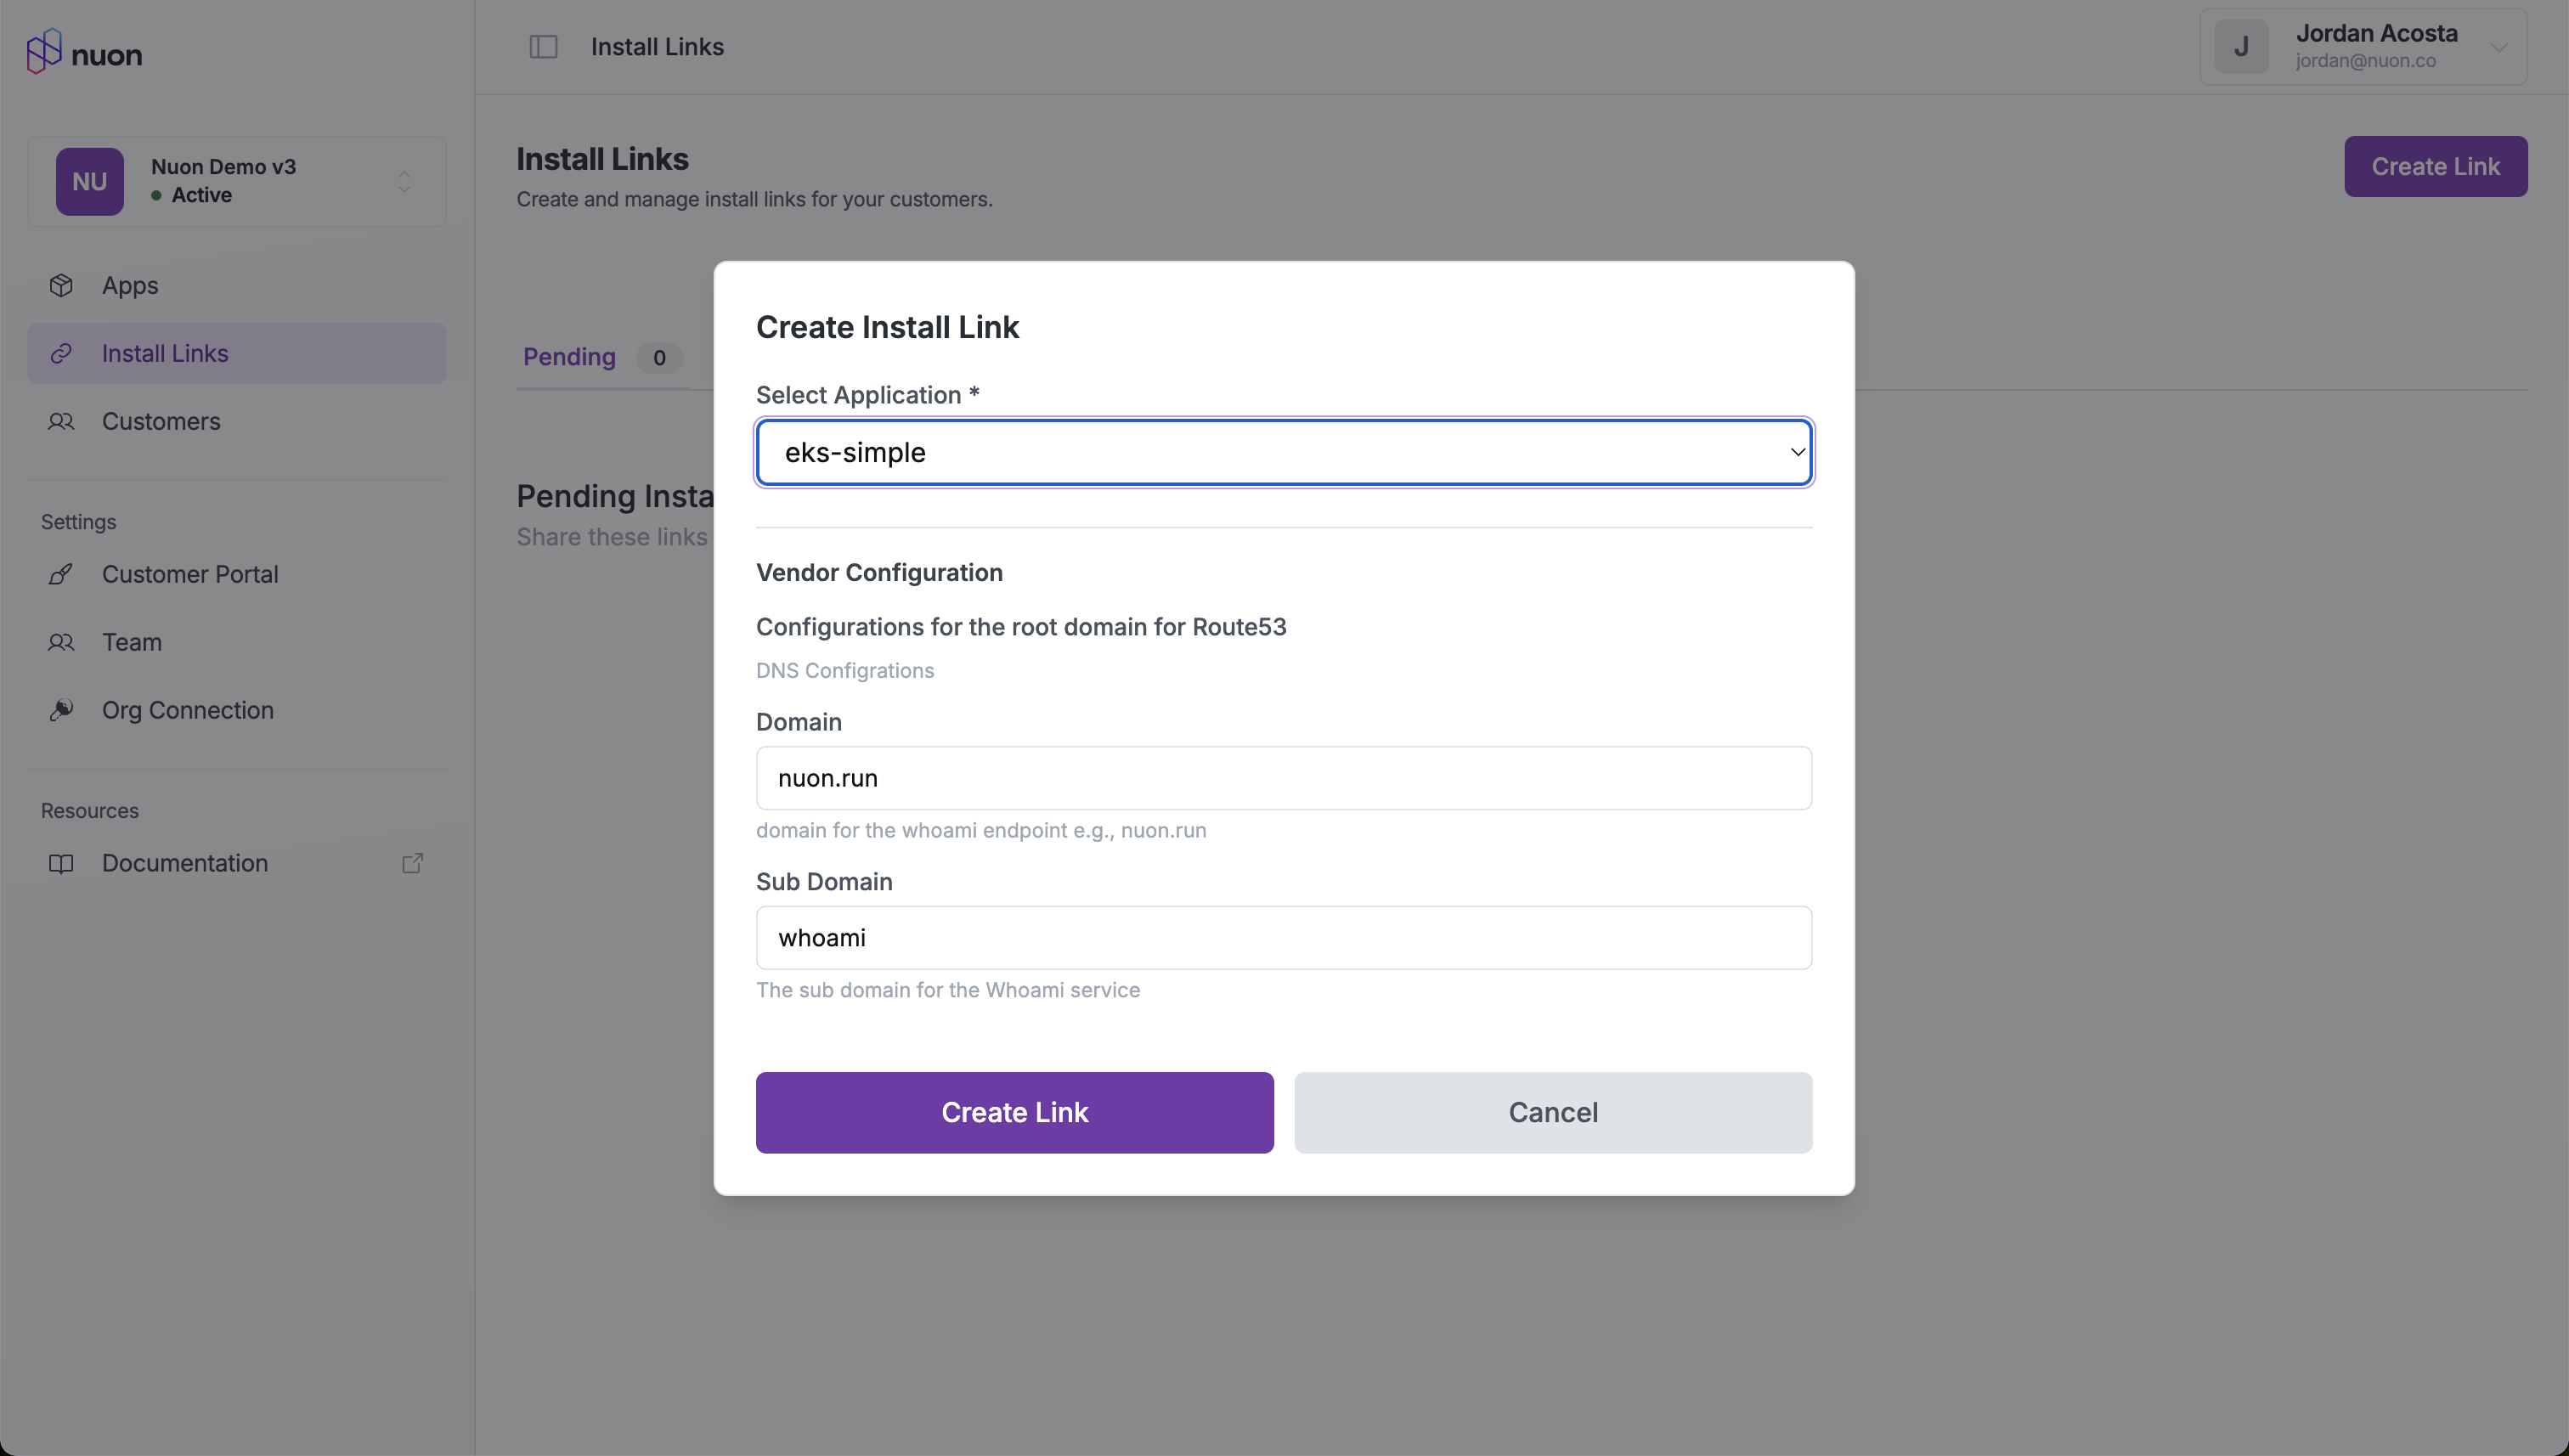
Install the App
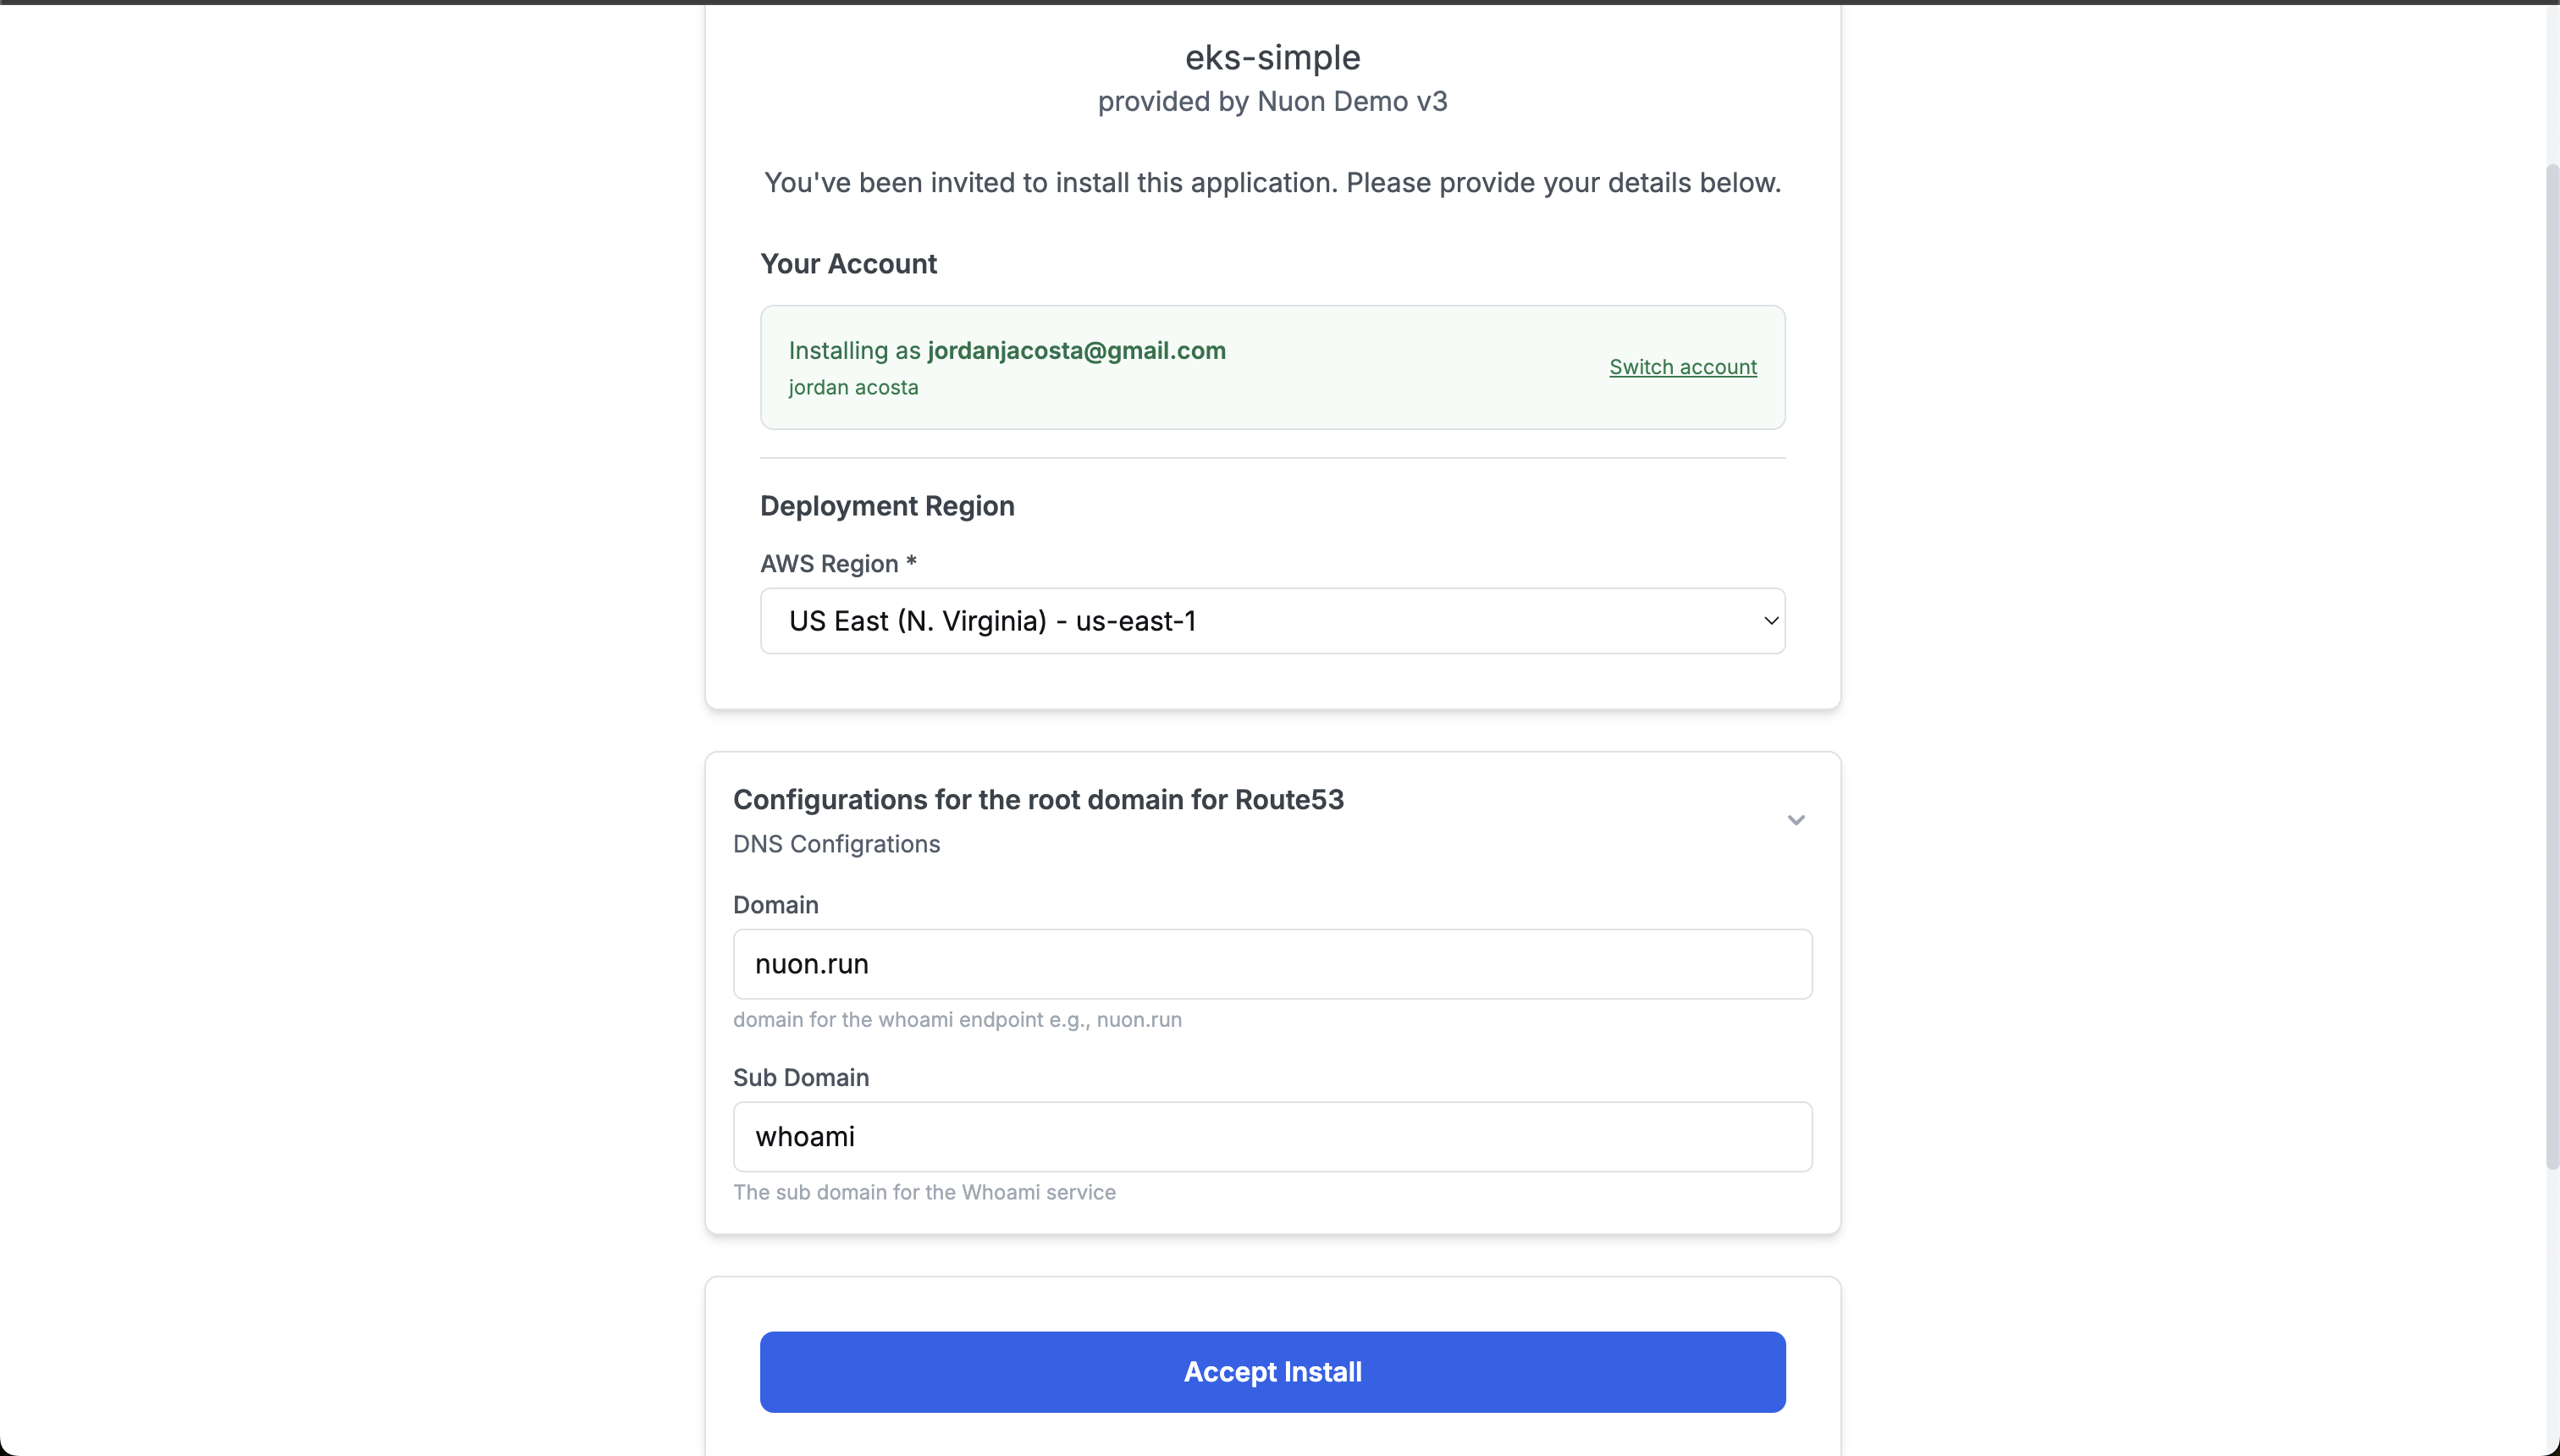
When your customer follows the link, they will be shown an install creation form. When they fill out the required inputs and click “Accept Install”, the new install will be added to their account.If your customer has never logged into the portal before, they will be redirected to the portal login, and then redirected back to the install form after logging in.
Install the Runner
The first step for your customer in this workflow is to install the runner. Once the workflow reaches the “Await Install” step, the portal will update to show them the installation instructions.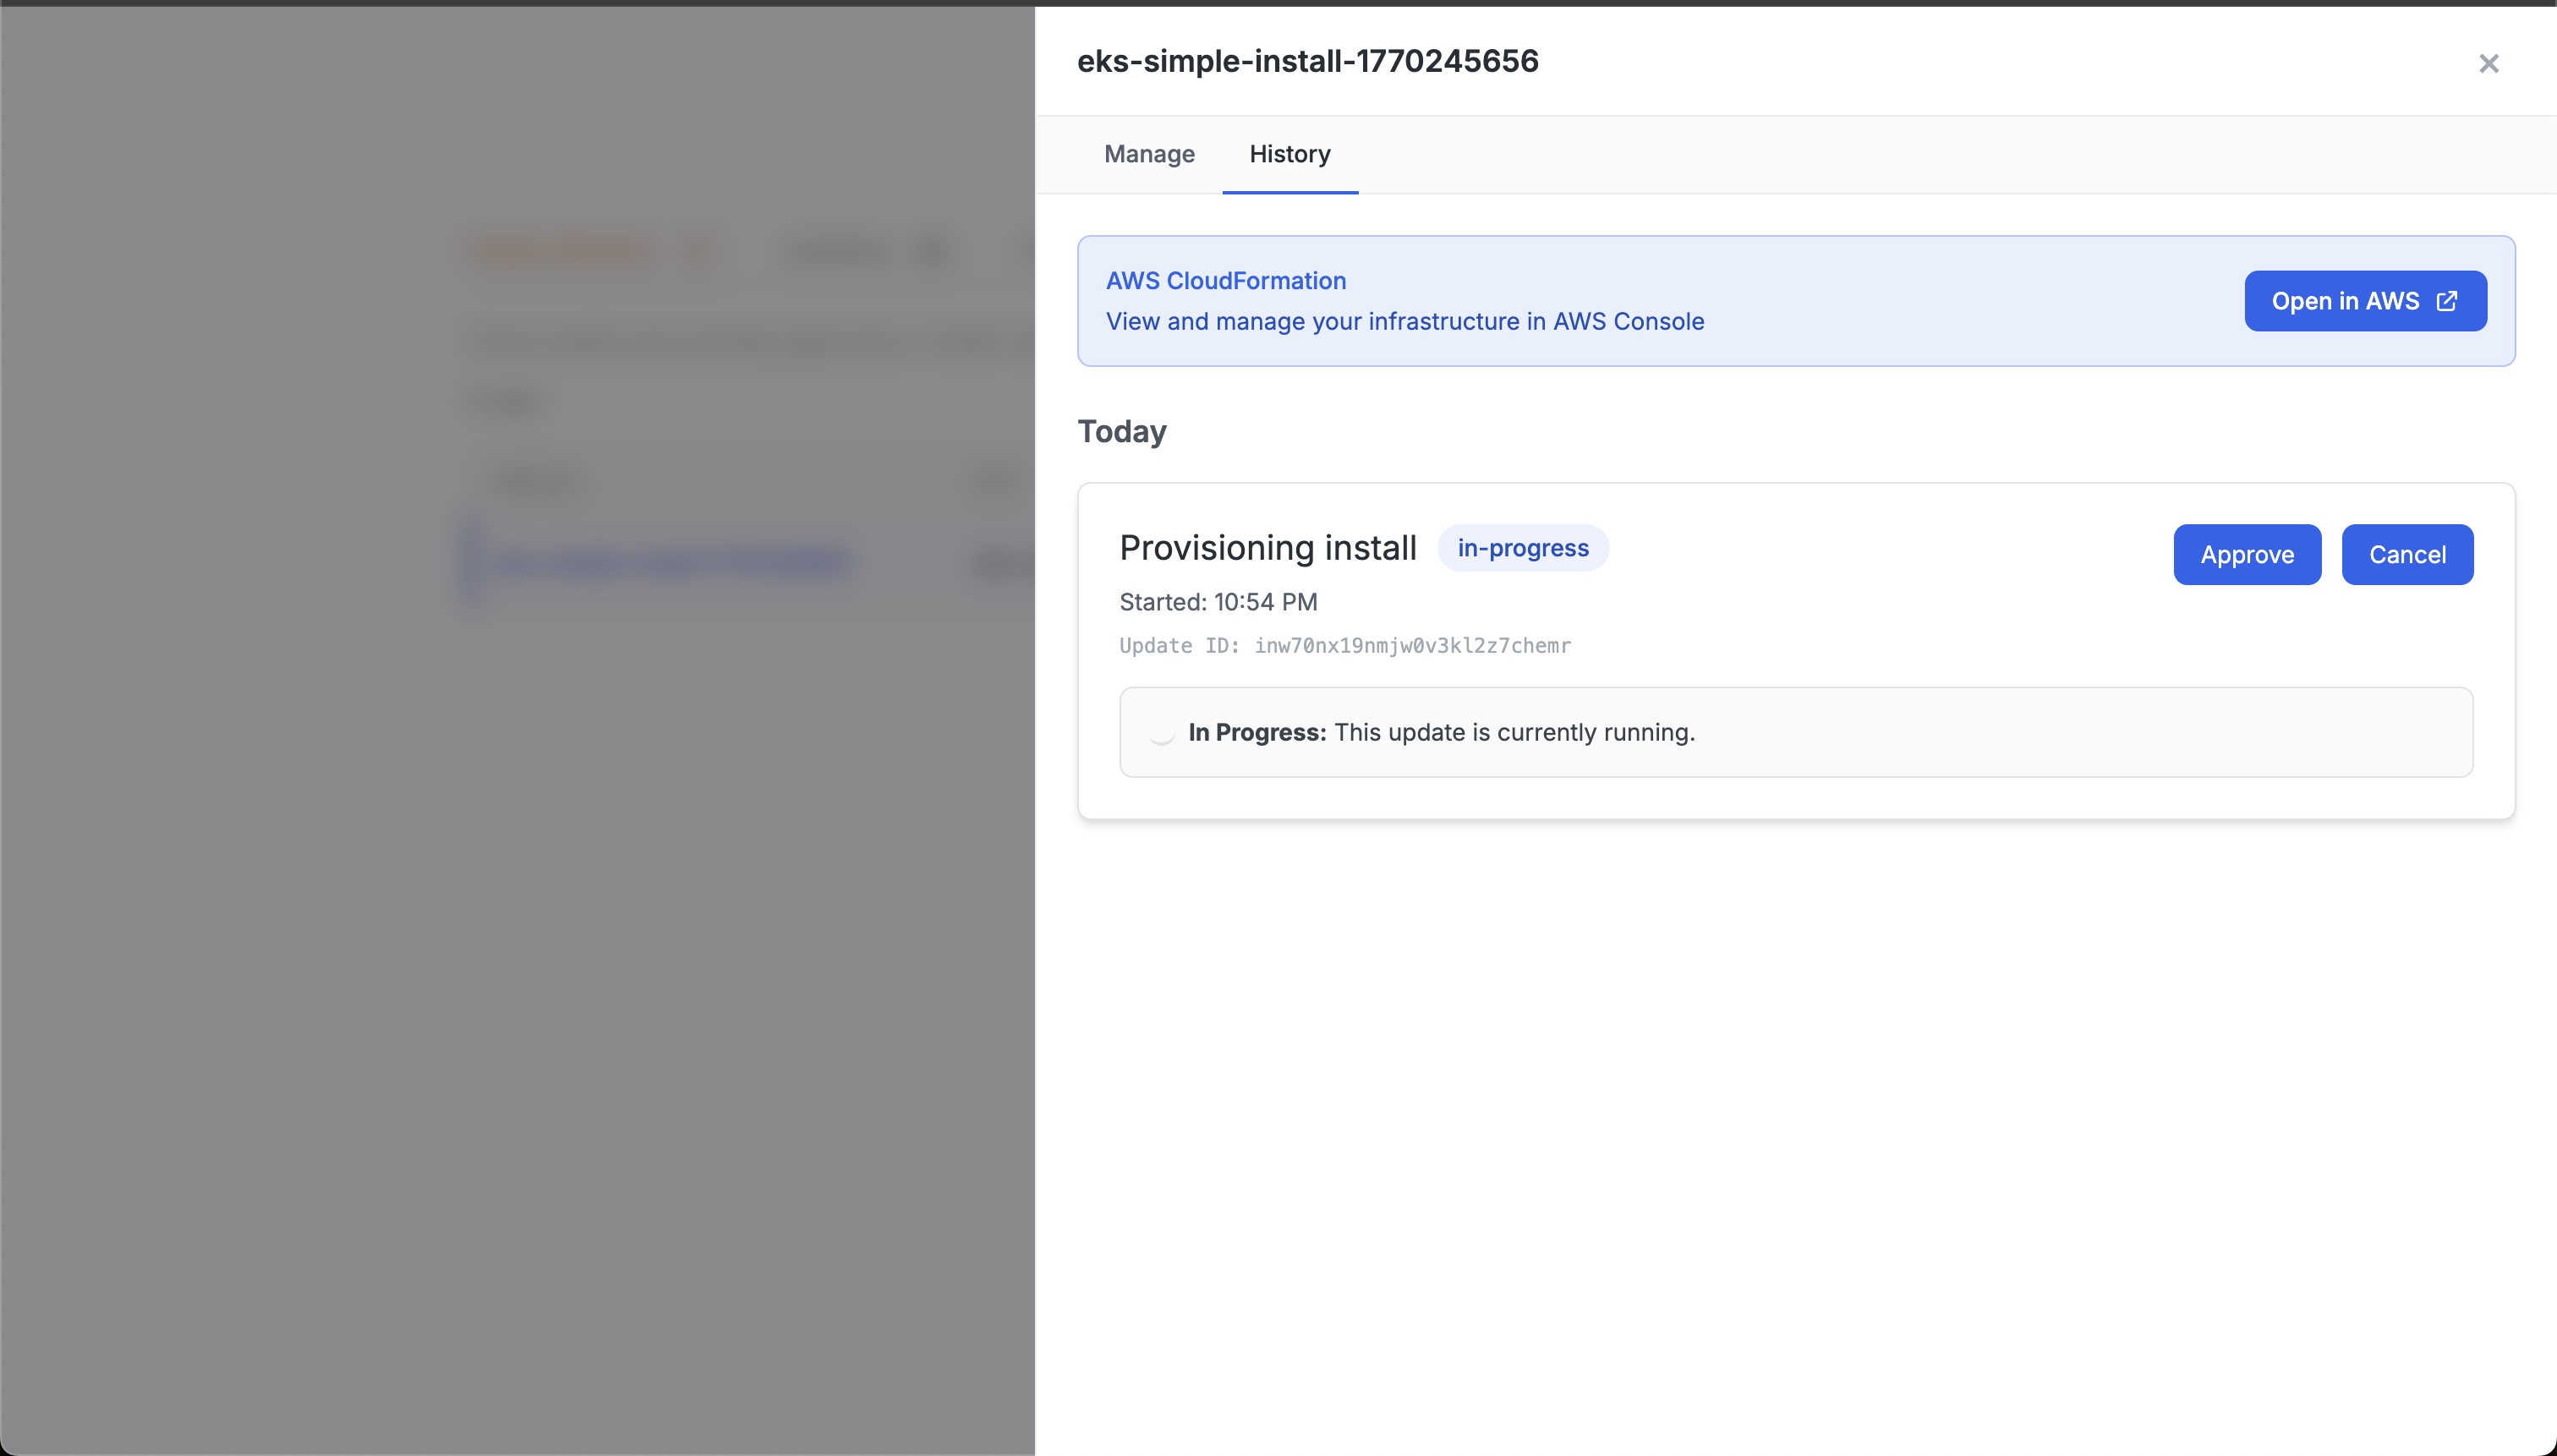
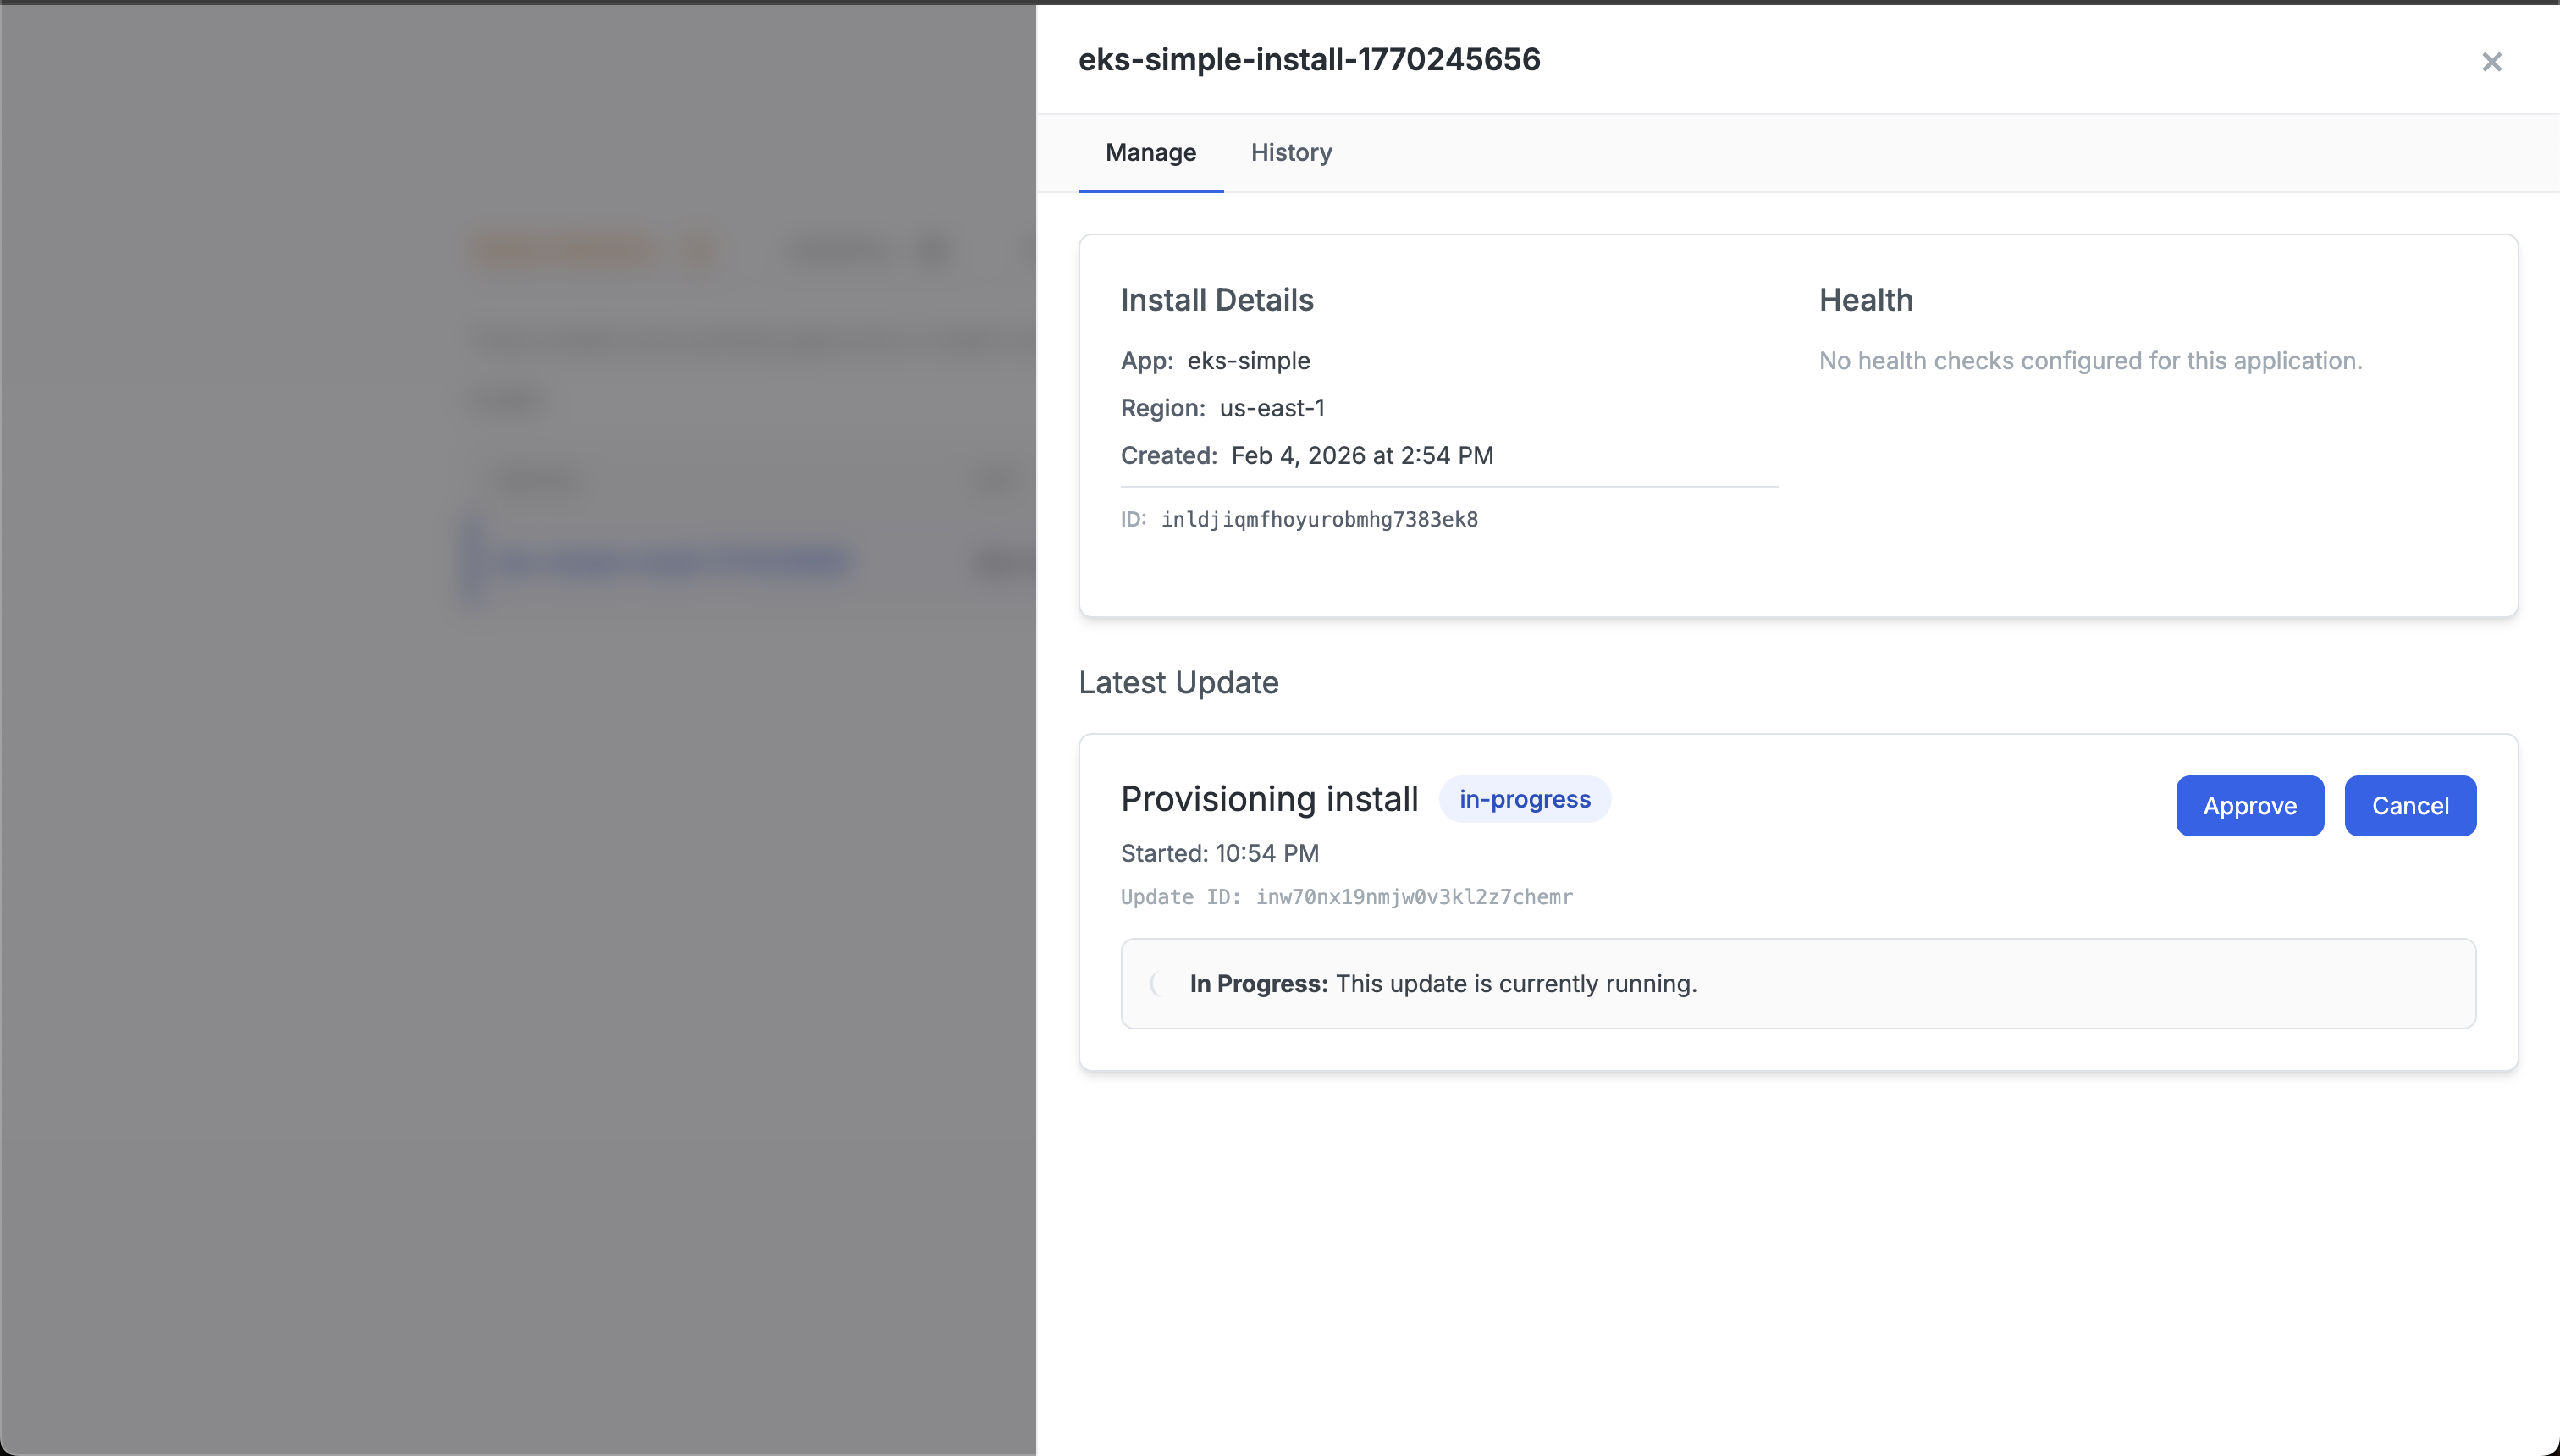
Approve the App Installation
When the runner is ready to provision your app, the customer will be shown an approval button. This is equivalent to “Approve All” in the Dashboard, and will allow the runner to provsion the sandbox and your app components.